
Nailing a salon-quality blow dry at home feels like a superpower, doesn't it? It’s not just about getting your hair dry; it’s an art form. It’s that special combination of the right tools, our incredible products, and a bit of technique that creates a style with bounce, smoothness, and serious staying power. Once you master a few key tricks of the trade, you can say goodbye to frizz and hello to a flawless finish. Every. Single. Time.
Your Guide to a Salon-Worthy Blowout
Have you ever spent what feels like an eternity blow-drying your hair, only to be greeted by a frizzy halo in the mirror? Or maybe you've painstakingly styled your hair into perfect waves, just for them to deflate before you've even had your morning coffee. Trust me, you're not alone. It’s a common story that turns a simple routine into a daily struggle.
But what if I told you that you could change all that?
This guide is about to become your new best friend for achieving that polished, just-left-the-salon look in your own bathroom. We're going to ditch the old 'blast it with hot air and hope for the best' method and dive into the real art of a proper blowout. It’s all about technique, a little bit of patience, and—crucially—using the right products from our collection to protect your hair and lock in your style.
The Foundation of a Flawless Finish
The line between a pretty good blow dry and a jaw-droppingly gorgeous one is all in the details. Most people don’t even realise they’re making tiny mistakes that sabotage their final look.
Sound familiar? A few common culprits include:
- Aiming the hairdryer nozzle haphazardly, which roughs up the hair cuticle and practically invites frizz to the party.
- Starting the whole process with sopping wet hair, which is a one-way ticket to heat damage.
- Skipping the essential styling products that protect your strands and give your style the hold it needs.
Fixing these little habits is the first step to a total blow-dry transformation. And remember, a truly professional look sometimes goes beyond just styling. Getting a handle on other pro techniques, like knowing how to mix hair color and developer like a pro, can seriously elevate your entire hair game.
Why a Great Blowout Matters
A killer blowout does so much more than just dry your hair—it’s the foundation for your entire look. When you do it right, you’re actually sealing the hair cuticle down. This is the secret to unlocking that incredible, light-reflecting shine and buttery smoothness. It tames flyaways and creates a polished style that holds its shape all day long.
Think of it this way: A great blowout isn't a chore; it's an investment. Taking an extra 15-20 minutes to do it right can give you a style that lasts for two or even three days, saving you a ton of time in the long run.
Ultimately, our goal is to help you turn a frustrating task into a moment of self-care that delivers stunning, healthy-looking hair. So, get ready to learn the secrets to that perfect finish, with a little help from our handpicked products designed to make it all a breeze.
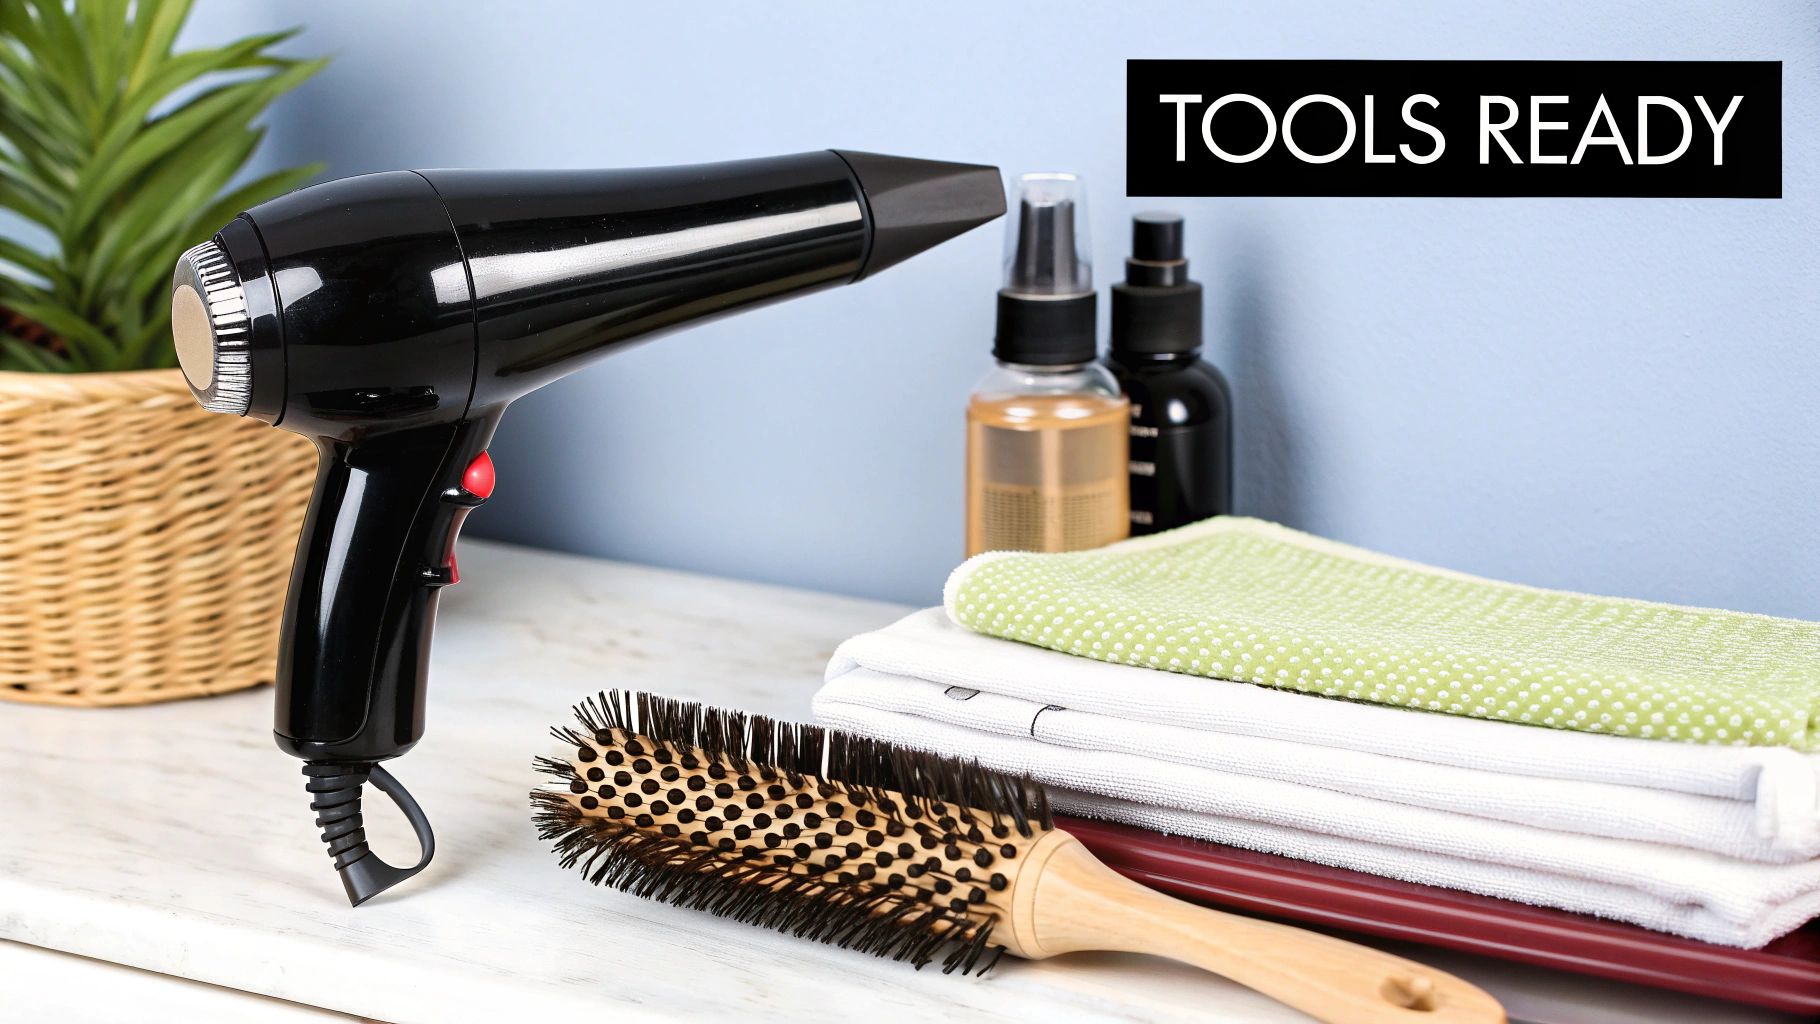
Your Essential At-Home Blowout Toolkit
To get you started, here’s a quick rundown of the must-have products and tools from our collection that will help you achieve the perfect blowout at home. Think of this as your personal cheat sheet for salon-level results.
| Product/Tool | Why It's a Game-Changer | Find It on Our Website |
|---|---|---|
| Heat Protectant Spray | This is your non-negotiable first step. It creates a shield against heat damage, preventing breakage and split ends. | [Shop Heat Protectants] |
| Volumising Mousse | Applied to the roots on damp hair, it gives incredible lift and body that won't fall flat by lunchtime. | [Shop Styling Mousses] |
| Ceramic Round Brush | The ceramic barrel heats up evenly, acting like a mini curling iron to smooth hair and create soft waves. | [Shop Round Brushes] |
| Ionic Hair Dryer | Ionic technology breaks down water molecules faster, cutting down on drying time and reducing frizz for a sleeker finish. | [Shop Hair Dryers] |
| Shine Serum | A tiny drop smoothed over your finished style tames any last-minute flyaways and adds a glossy, high-end sheen. | [Shop Shine Serums] |
Having these essentials in our collection is half the battle won. They’re specifically designed to work together to give you that bouncy, beautiful hair you’re after.
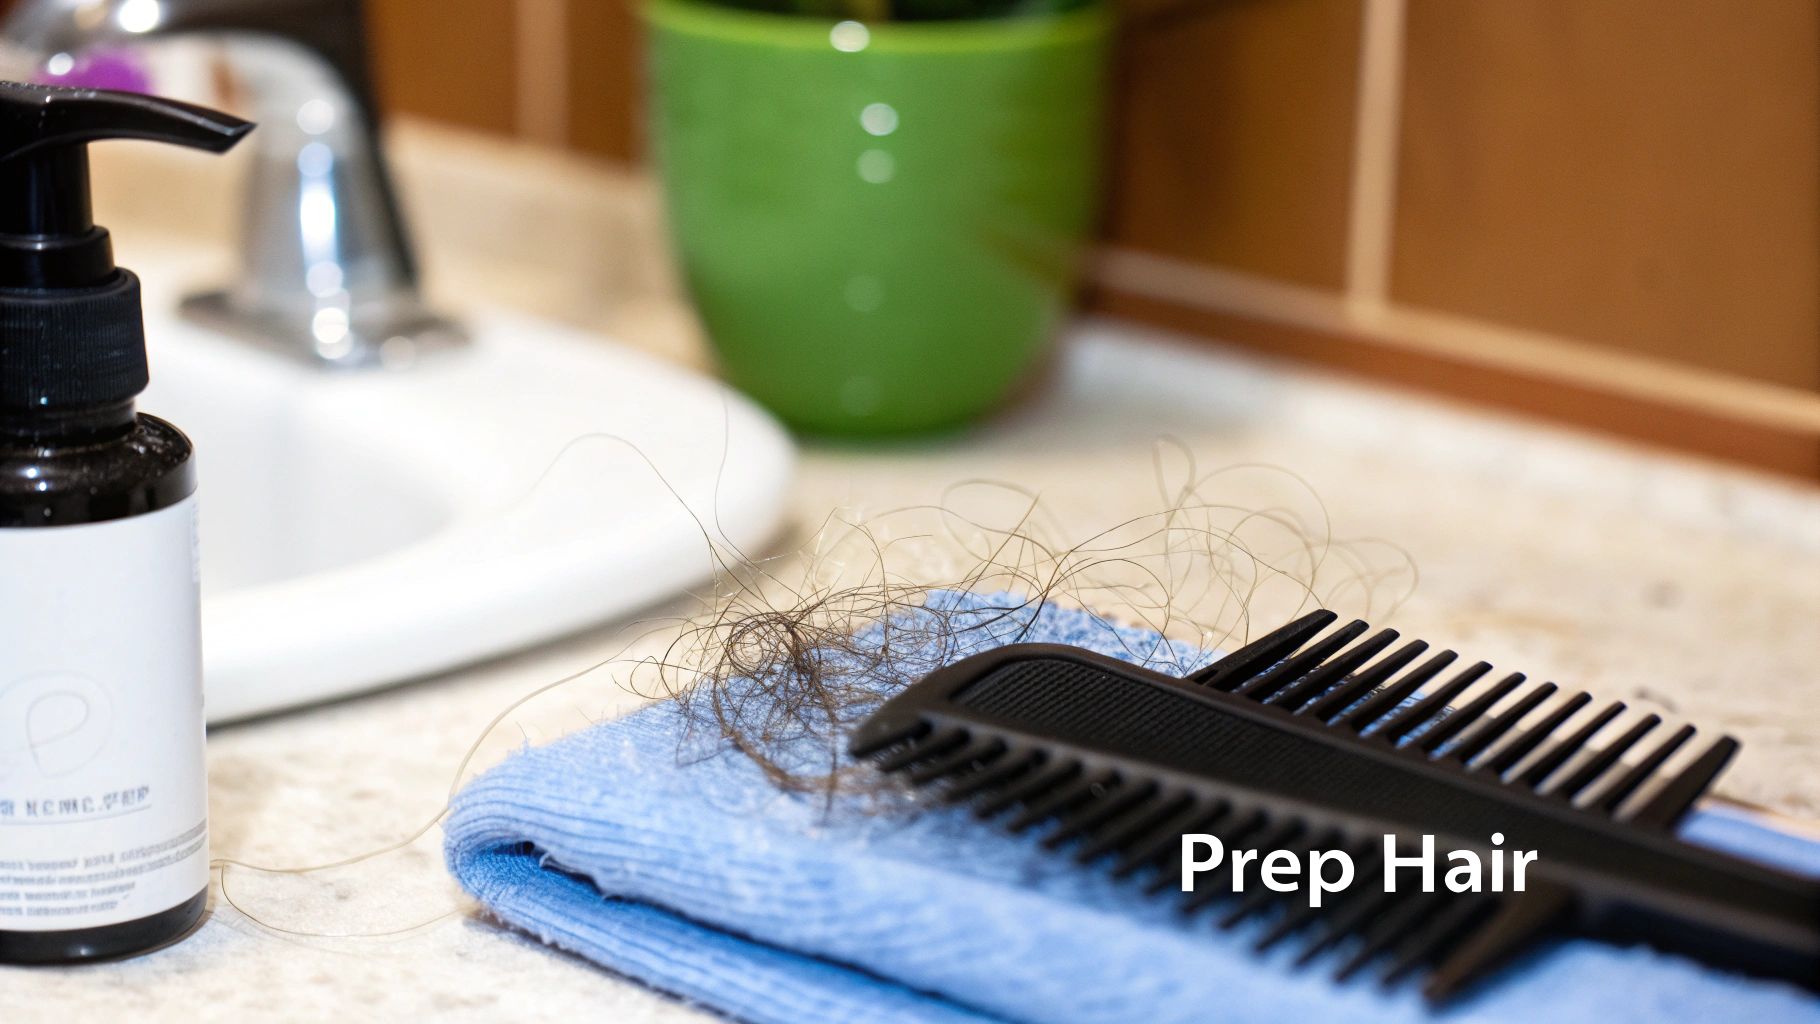
Prepping Your Hair for Flawless Results
Let’s get one thing straight: a truly amazing, salon-worthy blowout doesn’t just happen the moment you switch on the dryer. The real magic? It’s all in the prep work. This is where you lay the groundwork for a style that's smooth, shiny, and actually lasts.
Think of it like this: you wouldn't just throw paint at a canvas and hope for the best, right? You'd prime it first. Your hair deserves that same level of care before any heat gets near it. This is your chance to get ahead of common hair woes like frizz or flatness before they even start.
Start with the Right Cleanse and Condition
It all kicks off in the shower. Seriously. Grabbing a shampoo and conditioner duo from our collection that’s made for what you want to achieve is an absolute must. If you’re chasing volume, a lightweight volumising formula is your new best friend. If your hair is feeling a bit parched, a hydrating duo will give it the drink it's craving.
This isn't just about getting your hair clean; it’s about setting it up for success. Our formulas are designed to give your hair the perfect balance of moisture and strength, making it so much easier to work with. Remember, a well-hydrated strand of hair is a happy, cooperative one.
The Gentle Art of Towel-Drying
Okay, you're out of the shower. Whatever you do, resist the temptation to go to town on your hair with that rough bath towel. That vigorous rubbing is basically an invitation for frizz, as it roughs up the hair's cuticle layer.
Instead, gently squeeze and blot the excess water out. You're aiming for damp, not dripping wet. Getting your hair about 60-70% dry before you even pick up the hairdryer is the pro move. Not only does this save you a heap of time, but it also means way less heat exposure for your precious locks. If you're really in a rush, we've got more tips on how to dry hair quickly.
Don’t just skim over this bit! A simple squeeze-and-blot can make a massive difference in fighting frizz and preventing breakage. It really sets you up for a smoother finish.
Now that your hair is perfectly prepped and damp, it's time for the most critical step of all.
Your Shield Against the Heat
This is the non-negotiable, hero moment of your prep routine. Applying a heat protectant is hands-down the most important thing you can do before blow-drying. Our heat protectant sprays create a weightless shield around every single strand, standing guard against heat damage.
It's not just about stopping breakage; it's about getting that sleek, polished look. Our styling experts will tell you to keep the dryer moving and about 15 cm away from your hair. They also back up the power of a good heat protectant, which can shield hair from temperatures soaring up to 230°C. The right product has been shown to slash damage like split ends by up to 86%.
To get it right, mist one of our heat protectant sprays all through your damp hair, from the roots right down to the ends. Then, grab a wide-tooth comb and gently work it through to make sure every last strand is coated. You've just given your hair its own personal bodyguard, ready to take the heat so your style can shine through.
Choosing the Right Dryer and Tools
Let’s be real for a second. Trying to get a salon-worthy blowout with a dusty, decade-old hair dryer is like trying to chop an onion with a butter knife. It’s a frustrating exercise that just won’t give you the polished result you’re after. The right tool doesn't just blast your hair with hot air; it's the difference between a frizzy mess and a flawless finish.
Honestly, not all dryers are created equal. The tech humming away inside them is what separates the good from the truly great. Understanding what you’re working with is the first step to unlocking that bouncy, brilliant hair you’ve been dreaming of. It’s less about brute force heat and more about the clever science behind it all.
The Power Behind the Perfect Blow Dry
One of the biggest game-changers in modern hair dryers is ionic technology. You can think of it as your personal anti-frizz bodyguard. Our ionic dryers shoot out a stream of negative ions that cleverly break down the positive ions found in water molecules on your hair. The result? Your hair dries way faster, which means less heat exposure. Plus, it seals the hair cuticle, leaving you with a ridiculously smooth, shiny finish.
While many dryers range from 1,600 to 2,000 watts, a beefy 2,000 watts is fantastic for getting thick hair dry in a hurry. However, our dryers are smarter. By combining ionic and ceramic technologies, they speed up the process without needing to crank up the power, which is a massive win for the long-term health of your hair. You can read more about hair dryer technology on our blog.
We're firm believers that adjustable settings are completely non-negotiable. Our dryers put you in the driver's seat with total control over both heat and airflow. This lets you customise the whole experience to your hair's unique personality, preventing damage and guaranteeing a perfect result every single time.
Picking the right model from our range really just comes down to knowing your own hair. Whether it's fine and fragile or thick and glorious, we've got the perfect match waiting for you.
Match Your Dryer to Your Hair Type
Finding your ideal hair dryer is a bit like dating—it’s all about finding the right chemistry. The tool that works wonders on your best mate’s thick, wavy mane might be a total disaster for your fine, straight locks.
- For Fine or Thin Hair: You’ll want one of our dryers with a lower wattage and plenty of heat settings to play with. Gentle heat is your friend here, and our ceramic models are brilliant for delivering even, consistent warmth that won’t fry delicate strands.
- For Thick or Coarse Hair: Get ready to fall in love with our powerful ionic dryers. They slash drying time like you wouldn’t believe, and that ionic feature will tame frizz, leaving your hair feeling silky and under control.
- For Curly Hair: A dryer that comes with a diffuser attachment is an absolute must. Our diffusers are specifically designed to circulate air gently, defining your beautiful curls without turning them into a frizzy mess.
- For Straight Hair: To get that super-sleek, glass-hair look, grab one of our dryers with a concentrator nozzle. This little attachment is key to directing airflow precisely where you want it for a smooth, polished finish.
Once you’ve met your perfect dryer, it's time to talk about its entourage. The right attachments and brushes are the supporting actors that will help your blowout steal the show.
Find Your Perfect Match in Our Hair Dryer Collection
Choosing a new dryer can feel overwhelming, but we've made it simple. This table breaks down our exclusive models to help you find the one that will make you feel like you've just stepped out of the salon.
| Our Dryer Model | Perfect For This Hair Type | Key Technology Feature | Why You'll Love It |
|---|---|---|---|
| AeroLight Pro | Fine to Normal Hair | Ceramic Heat Coils | Delivers gentle, even heat that protects delicate strands from damage while adding volume. |
| Ionic Velocity 2000 | Thick, Coarse, or Frizzy Hair | Advanced Ionic Generator | Slashes drying time and zaps frizz for an unbelievably smooth and shiny finish. |
| CurlDefine Diffuser | Curly and Wavy Hair | Vortex Diffuser Attachment | Enhances your natural curl pattern without the frizz, giving you defined, bouncy curls. |
| SleekFinish Precision | All Hair Types (especially straight) | Narrow Concentrator Nozzle | Provides pinpoint accuracy for creating sleek, straight styles or polished waves. |
Each of our dryers is designed with your hair's health and beauty in mind. Whichever you choose, you're investing in a tool that will give you gorgeous results for years to come.
Essential Tools for Next-Level Styling
Those attachments that come in the box with our dryers? They’re not just spare plastic bits to get lost in a drawer. They are vital tools for crafting specific, incredible looks.
The concentrator nozzle is your best mate for creating smooth, straight styles. It focuses the airflow into a direct stream, giving you the control you need to smooth every last strand.
And for my curly-haired friends, the diffuser is nothing short of magic. It distributes air over a much wider area, which enhances your natural curl pattern while keeping frizz at bay. It's like gently cupping your curls with a warm, soft breeze.
Of course, we can't forget the brushes. A high-quality round brush from our collection is the secret to creating incredible volume, shape, and movement. The size of the barrel really matters here: a smaller barrel will give you tighter curls and waves, while a larger one is what you need for that classic, bouncy blowout with soft, sweeping curves. Pair the right brush with one of our dryers, and you'll nail that fresh-from-the-salon look every single day.
Mastering Your Blowout Technique
Alright, let's get to the good stuff. You've prepped your canvas perfectly, and now it's time to create a bit of magic. Mastering a great blowout isn't about wildly waving a dryer around and hoping for the best; it's about technique. It’s the secret to transforming damp, unruly locks into a smooth, bouncy, and polished style that actually lasts.
Forget just blasting your hair with hot air until it feels dry. The real key to that ridiculously good salon finish comes down to two things: control and tension. I'll walk you through a simple, repeatable technique that puts you in the driver's seat, so you can get stunning results every time.
The Foundation of Control: Sectioning Your Hair
If you take only one piece of advice from this entire guide, let it be this: sectioning is non-negotiable. Seriously. Trying to dry your entire head of hair in one go is a one-way ticket to Frizzville, not to mention a serious arm workout.
By working in small, manageable sections, you make sure every single strand gets the attention it deserves, which is the whole point!
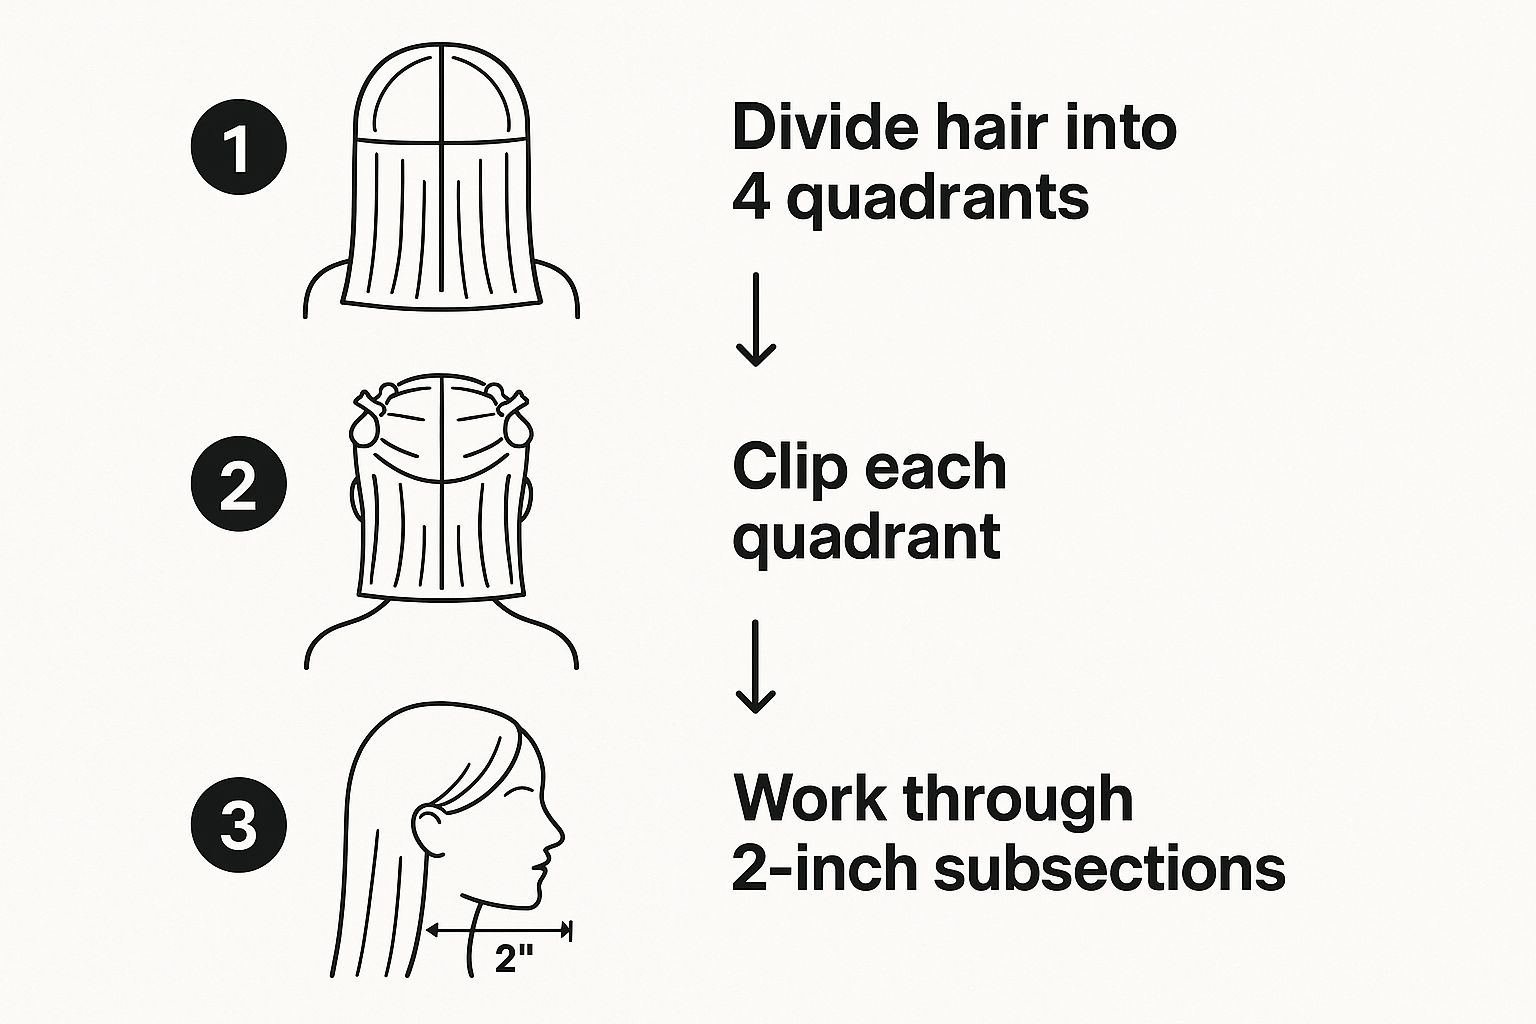
This little trick of dividing, clipping, and conquering is what separates a pretty good home blowout from a phenomenal one. It's the difference-maker.
The Core Technique: Tension and Airflow
Now that you're all organised, we can get down to business. The whole goal here is to smooth the hair's cuticle—that outer layer of the hair shaft. When the cuticle is smooth and flat, it reflects light like a mirror, and that's where you get that incredible, healthy-looking shine.
Grab a round brush and about a two-inch subsection of hair. Pop the brush right at the root and wrap the hair around it once. This is where you create tension—a gentle but firm pull that gives the hair the structure it needs to become smooth.
As you pull the brush down through the hair, follow it closely with your hair dryer, and make sure that concentrator nozzle is on. This is crucial: always, always aim the airflow down the hair shaft, from root to tip. This encourages the cuticle to lie flat, sealing it shut to lock in smoothness and kick frizz to the curb.
Pro Tip: Your section of hair should never be wider than the barrel of your brush. This is a game-changer for getting even heat and having maximum control for the smoothest possible finish.
Crafting Your Desired Style
The beauty of this core technique is that you can tweak it to create all sorts of different looks.
-
For a Super-Sleek Finish: Go for a larger barrel round brush. This will help you create maximum tension for an incredibly smooth, straight style. Take your time, working slowly from root to tip and making sure each section is 100% dry before you even think about moving on. For an even glassier look, you can check out our ultimate guide to hair smoothing treatments for ideas that can complement your blowout.
-
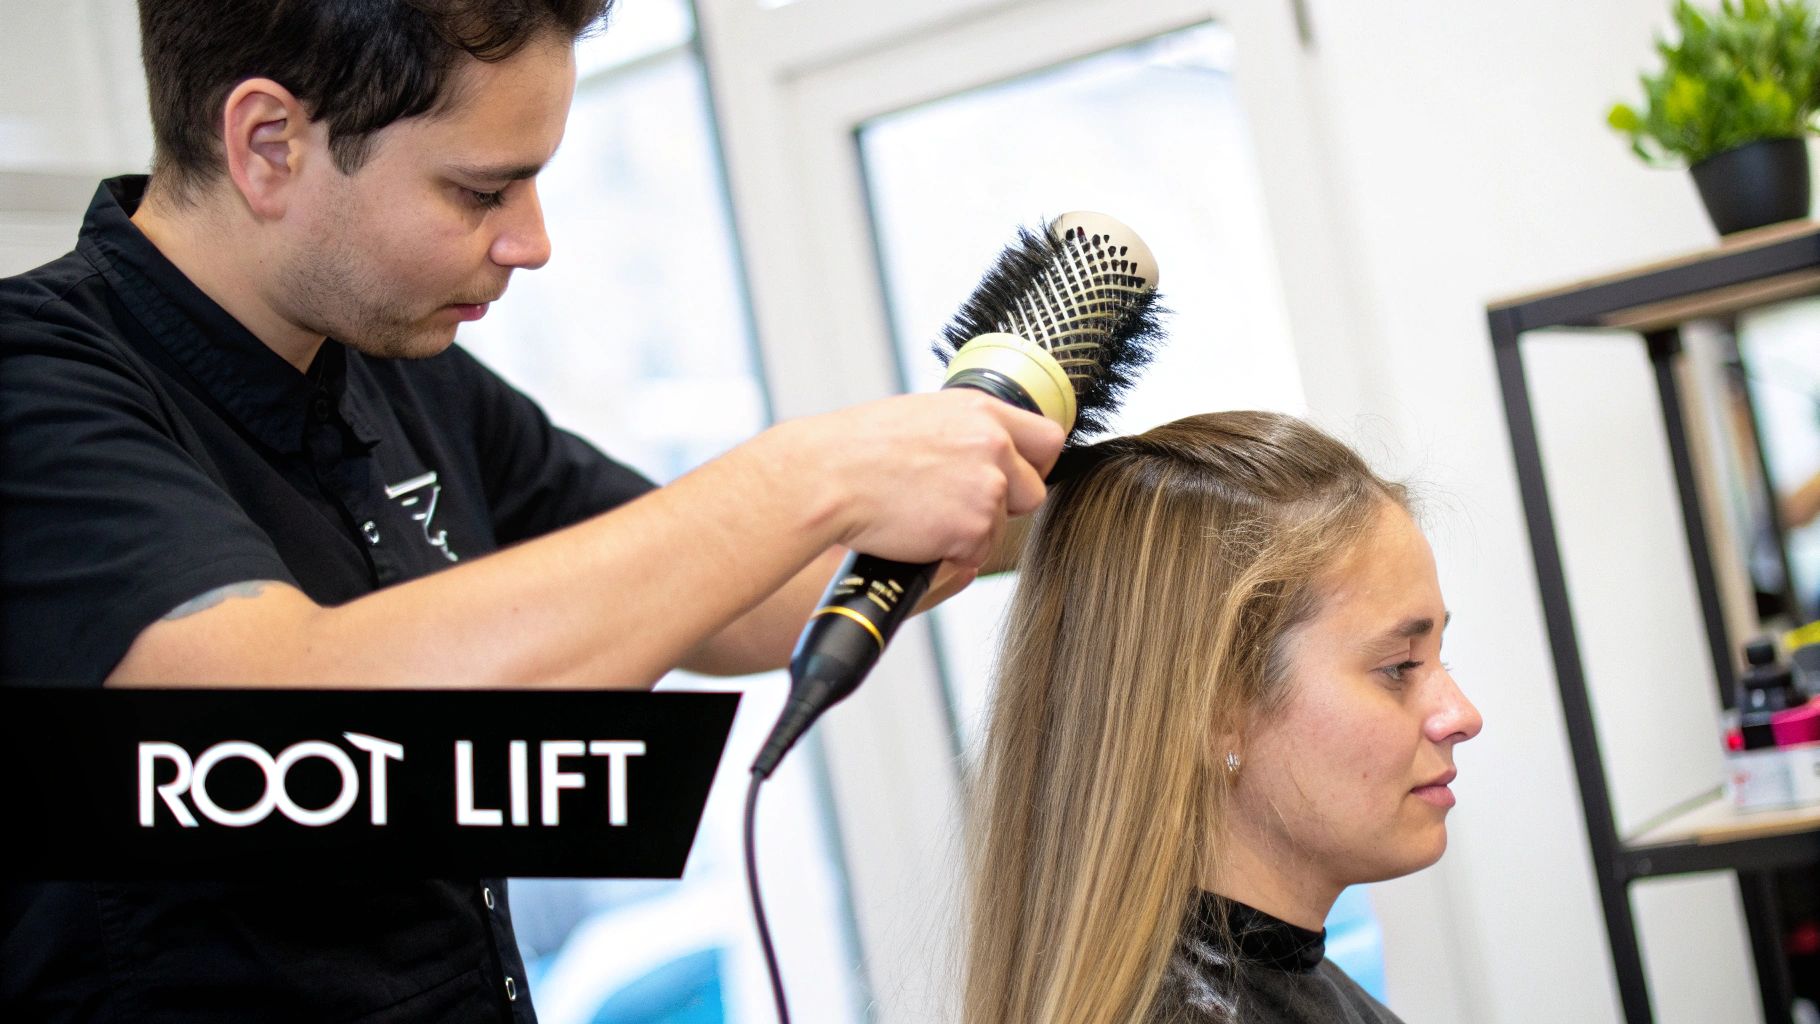
For Bouncy Root Volume: When you get to the sections on top of your head (the crown), it's time to switch things up. Instead of just pulling down, lift the hair up and away from your scalp at a 90-degree angle. Hold that tension at the root with the heat on it for just a few extra seconds. This builds in lasting lift before you pull the brush through the ends.
-
For Defining Natural Waves: Blessed with some natural texture? Ditch the nozzle and grab your diffuser. Gently cup sections of your hair in the diffuser bowl, using a low speed and medium heat. Don't scrunch aggressively! This just encourages your natural wave pattern to form without creating a halo of frizz.
Locking It All In
You’ve done the hard work, and your hair is looking incredible. Now for the final, and most important, step: making sure it stays that way.
Just before you release a finished section from your round brush, give it a quick blast with the cool shot button on your dryer.
This rapid drop in temperature is a stylist's secret weapon. It instantly sets the style in place, whether it's a sleek finish or a bouncy curl. Think of it like "freezing" the shape you've just created, which gives your blowout serious staying power.
Once every section is dry and has been cooled, gently run your fingers through your hair to break it up and blend the sections together. And that's it—you've officially nailed a flawless, long-lasting, salon-worthy blowout right in your own bathroom.
Finishing Your Style and Making It Last
You’ve done it! The heat is off, the sections are down, and your hair is looking absolutely incredible. But hang on a second—the masterpiece isn't quite complete. This final stage is all about those little finishing touches that take your style from simply "dry" to "dazzling" and make sure it actually lasts.
Think of it as the top coat on a perfect manicure or the final seasoning in a gourmet dish. These last steps are what separate a good blowout from a great one. Let’s walk through the final products from our collection and how to use them for maximum impact.
Add a Touch of Brilliant Shine
Once your hair has completely cooled down, it's time to amp up the gloss. A few drops of a lightweight finishing oil from our range are pure magic for adding that reflective, healthy-looking sheen and taming any last-minute flyaways that might have popped up.
The key here is less is more. Seriously. Pop just one or two drops into your palms, rub them together to warm it up, and then gently skim it over the mid-lengths and ends of your hair. Steer clear of the roots to keep all that hard-earned volume intact. This simple step seals the cuticle even further, making your hair look ridiculously smooth and polished.
Don’t underestimate the power of this final gloss. It’s what creates that liquid-hair effect, making your blowout look incredibly luxe and professional. Just a tiny amount makes a world of difference.
Of course, getting a smooth finish starts way back with your dryer. The rise of ionic hair dryers has been a game-changer, especially with our humidity. The technology uses negative ions to break down water molecules, which speeds up drying and, more importantly, cuts down on static and frizz. It’s a huge part of achieving that healthier, shinier look right from the get-go.
Create Texture and Set Your Style
Now that you've got the shine, let's talk about hold and movement. What you use next really depends on the vibe you’re going for.
-
For Effortless Movement: If you're after that perfectly imperfect, "lived-in" look, a texturising spray is your go-to. Lift sections of your hair and mist it lightly throughout for touchable texture and definition without a hint of stickiness.
-
For Flexible Control: To lock in your style without making it feel stiff or crunchy, reach for a flexible-hold hairspray from our collection. Hold the can about 30cm away and spray in a continuous motion. This will give your blowout memory and hold while still letting it bounce and move naturally.
If frizz is still your nemesis even after all this, it might be time to bring in the big guns. Check out our in-depth guide to frizz-free hair with Matrix Mega Sleek for some targeted solutions.
Preserve Your Blowout Overnight
Want to wake up with hair that looks almost as good as it did on day one? The secret is all about how you protect it while you sleep. A couple of simple tricks can preserve your style and save you a tonne of time in the morning.
First up, the "pineapple trick". Gather your hair into a very high, loose ponytail right on top of your head, and secure it with a gentle scrunchie (a silk one is even better!). This keeps your hair from getting flattened or tangled while you toss and turn.
Next, swap your cotton pillowcase for a silk or satin one. It’s a classic for a reason! The smooth surface creates way less friction, which means less frizz and fewer tangles come morning.
Refresh and Revive on Day Two
When your style needs a little pick-me-up, a good dry shampoo from our collection is your best friend. But don't just spray it everywhere! Be strategic. Lift sections of hair around your crown and parting, and spray it directly onto the roots.
Let it sit for a minute or two to work its magic and absorb any oil, then get in there with your fingertips and massage it in. This will instantly bring back volume and freshness, extending the life of your gorgeous blowout for another day.
Oops! Common Blow-Drying Blunders (and How to Fix Them)
Ever spent ages on a blowout, only to end up with a frizzy mess or a style that collapses in five minutes? We’ve all been there. It’s frustrating, but the good news is that most blow-drying fails come down to a few common, and easily fixable, slip-ups.
Let's talk about frizz. If your hair looks more fluffy than flawless, check your aim. Blasting air all over the place roughs up the hair’s cuticle (its outer layer), and a ruffled cuticle is what creates that unwanted frizz. The fix is simple: always, always point your dryer's nozzle down the hair shaft, following your brush from root to tip. This smooths everything down, leaving you with that silky, salon-worthy shine.
Another classic mistake is going straight from shower to styler. Attacking sopping wet hair with a blow dryer not only takes forever but also sizzles your poor strands with unnecessary heat. Give your hair a fighting chance! Gently towel-dry or air-dry until it's about 60% dry before you even think about plugging in the dryer. Your hair will thank you for it.
Tackling Those Pesky Style Saboteurs
Are you fighting a losing battle against limp roots or annoying dents left by sectioning clips? Let’s get those sorted.
-
Flat Roots: If your hair is falling flat at the crown, it’s usually a technique issue. When you get to the top sections, grab one of our round brushes and lift the hair straight up and away from your scalp. A blast of hot air creates the volume, and a quick press of the cool shot button sets it in stone.
-
Clip Dents: We love sectioning clips, but we hate the creases they leave behind. The trick is to give each section a moment to cool down before you clip it up. If you’re in a rush, just fold a bit of tissue or paper towel and place it under the clip to act as a buffer. No more dents!
Honestly, the biggest mistake of all is skipping the prep. Not using a heat protectant from our range is like heading to the beach in the middle of an Aussie summer without any sunscreen. It’s a recipe for disaster. Our formulas are your first line of defence, shielding your hair and creating the perfect foundation for a great style.
Finally, slow down and be patient. Trying to dry massive chunks of hair at once is a shortcut to an uneven, frizzy finish. A good rule of thumb is to make sure your sections are never wider than the barrel of your brush. Taking that little bit of extra time to work in manageable sections is what separates a so-so blowout from a truly spectacular one.
Your Burning Blow-Drying Questions, Answered
Alright, so we've covered the A-to-Z of a killer blowout, but I bet a few questions are still rattling around in your head. Let's get into some of the most common things people ask me – I'll give you the straight-up answers you need to nail this.
Seriously, How Often Can I Blow Dry My Hair?
This is a big one, and a good one! Look, even though a professional-grade dryer is much kinder to your hair, heat is still heat. You need to give your hair a breather.
My rule of thumb? Aim to blow-dry no more than one or two times a week. This gives your hair a chance to just be, helping it hang onto its natural moisture. For those in-between days, a spritz of a quality dry shampoo from our collection at the roots works wonders to freshen things up.
What's the Real Story With All Those Heat Settings?
Faced with a bunch of buttons and settings on our dryers, it's easy to just crank it to high and hope for the best. Don't! Getting this right is what separates a good blowout from a great one.
Here’s the simple breakdown:
- High Heat & High Speed: Think of this as your "get the water out" setting. It's for that initial rough dry when your hair is sopping wet. The goal is to remove the bulk of the moisture, fast.
- Medium Heat & Low Speed: This is your styling sweet spot. Once you grab that round brush, dial it down. This gives you way more control and stops you from accidentally frazzling your hair.
- The Cool Shot: Your secret weapon! Once a section is dry and styled, hit it with a blast of cool air. This instantly sets the style, locks in shine, and makes your hard work last so much longer. It's the pro move everyone should use.
A little insider tip: the magic combo for sleek, shiny hair is tension and heat. Gently pulling the hair taut with a good round brush while applying directed heat is what smooths down the hair's cuticle. That’s how you get that ridiculously glossy finish.
Mastering these settings isn't just about avoiding damage; it's about making the tool work for you. It’s the difference between fighting with your hair and making it do exactly what you want.
Feeling ready to take your entire styling game to the next level? Head over to On Line Hair Depot to find the pro-level tools and products that will change everything. Your perfect hair day is waiting for you at https://onlinehairdepot.com.


