
Let's get one thing straight about frizz: it's not a personality flaw in your hair. It’s simply a cry for help. More specifically, a cry for moisture. When your hair feels dry, its outer layer—the cuticle—gets rough and opens up, practically inviting humidity from the air to come in and have a party. This is what causes that poofy, unruly texture we all know and loathe.
The secret to taming it? Beat the environment to the punch and give your hair the deep hydration it's desperately seeking.
Why Your Hair Frizzes in Australian Weather
Ever stepped outside on a sticky day in Sydney or felt that intense dry heat in the Outback? If so, you already know that Australian weather throws some serious curveballs at our hair. Frizz isn't just a random bad hair day; it’s a direct conversation your hair is having with its surroundings.
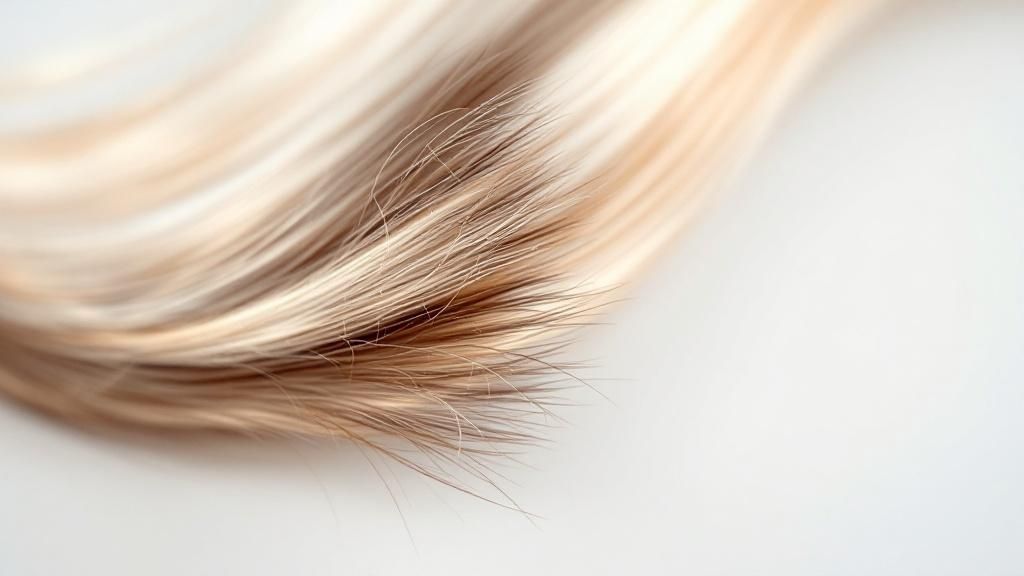
Picture each strand of your hair covered in tiny, overlapping shingles, just like a roof. That's your hair cuticle. When your hair is happy and well-hydrated, those shingles lie down flat and smooth, giving you that gorgeous, glossy finish. But when it's dry or damaged, those shingles lift up, creating a rough, porous surface.
This is where the weather wreaks its havoc. In a humid coastal city, the air is thick with moisture. Your thirsty hair, with its lifted cuticles, will literally grab that moisture from the atmosphere. This sudden rush of water makes the hair shaft swell up all unevenly, and voilà—you’ve got frizz.
The Double-Whammy of Humidity and Dry Heat
It's not just the classic high-humidity frizz we're battling here in Australia. Our diverse climates mean we get hit from both sides.
- Coastal Humidity: Think Brisbane, Cairns, or Darwin. In these places, the main game is to create a barrier that stops your hair from soaking up all that excess moisture in the air.
- Dry Inland Heat: Head to a place like Alice Springs, and the challenge flips. The dry air actively sucks moisture out of your hair, leaving it parched, brittle, and prone to static and flyaways.
This is exactly why figuring out how to control frizzy hair means getting smart about your local climate. There’s no single solution that works for everyone. It's a known fact that environmental factors are a huge trigger; research shows that roughly 60% of Australian city-dwellers blame their frizz on weather-related dryness. This just proves how vital it is to consistently use products that both moisturise and seal the hair cuticle.
Getting to Know Your Hair's Porosity (aka Its Thirst Level)
Beyond the weather forecast, your hair’s inherent structure is a major player in the frizz game. This comes down to something called "porosity," which is basically a fancy term for how well your hair can absorb and hang onto moisture.
Frizz isn't a sign of "bad" hair; it's a sign of imbalanced hair. Your goal shouldn't be to fight against its nature. Instead, work with it by giving it the hydration it needs to stay happy and balanced, no matter what the weather is doing.
If you have high-porosity hair (which is common if you colour or heat-style regularly), your cuticles are quite open. This means your hair guzzles up moisture in a flash... but unfortunately, it loses it just as quickly. The result? Frizz in pretty much any climate.
On the other end of the spectrum is low-porosity hair, where the cuticles are very tightly packed. It's tough for moisture to even get in. When it finally does, if it isn't sealed in properly, the hair can still swell and frizz up.
Your Quick-Start Anti-Frizz Action Plan
Ready to take control? You don't have to overhaul your entire routine overnight. Here are a few simple swaps you can make today to start seeing a difference.
| Action Item | Why It Works | Simple First Step |
|---|---|---|
| Switch to a Microfibre Towel | Regular cotton towels have rough fibres that rough up your hair's cuticle, creating instant frizz. | Ditch your fluffy bath towel. Gently squeeze—don't rub!—excess water from your hair with an old T-shirt or a microfibre towel. |
| Rinse with Cool Water | Cold water helps to seal the hair cuticle, locking in moisture from your conditioner and creating a smoother surface. | At the very end of your shower, turn the tap to cool and give your hair a quick final rinse. It only takes 10 seconds! |
| Sleep on Silk or Satin | Cotton pillowcases absorb moisture from your hair and cause friction while you sleep, leading to frizz and tangles. | Swap your cotton pillowcase for a silk or satin one. It feels luxurious and helps your hair glide smoothly. |
Making just one or two of these small changes can set you on the right path. It’s all about creating habits that protect your hair's moisture balance instead of stripping it away.
Your Foundational Anti-Frizz Wash Routine
Smooth, manageable hair really does begin in the shower, long before you even think about styling. This isn't just about grabbing a different shampoo; it’s about building a smart wash-day ritual that acts as your first line of defence against frizz. The whole point is to infuse every single step with moisture, turning a simple cleanse into a powerful hydration treatment.
So, let's forget the old "quick scrub and rinse" mentality. We’re going to slow things down and be more intentional. The focus here is on techniques that protect your hair's delicate cuticle layer and keep it sealed tight against humidity. It’s time to make your wash day the absolute cornerstone of your anti-frizz game.
This kind of targeted hair care is something more and more people are looking for. In Australia, the hair care market is already valued at about USD 1.3 billion and is expected to hit USD 2.0 billion by 2033. A huge driver for this is our climate—high sun exposure and humidity are major culprits behind frizz, and people want solutions that actually work. You can find more details on these Australian hair care market trends over at imarcgroup.com.
Start Before You Even Get Wet
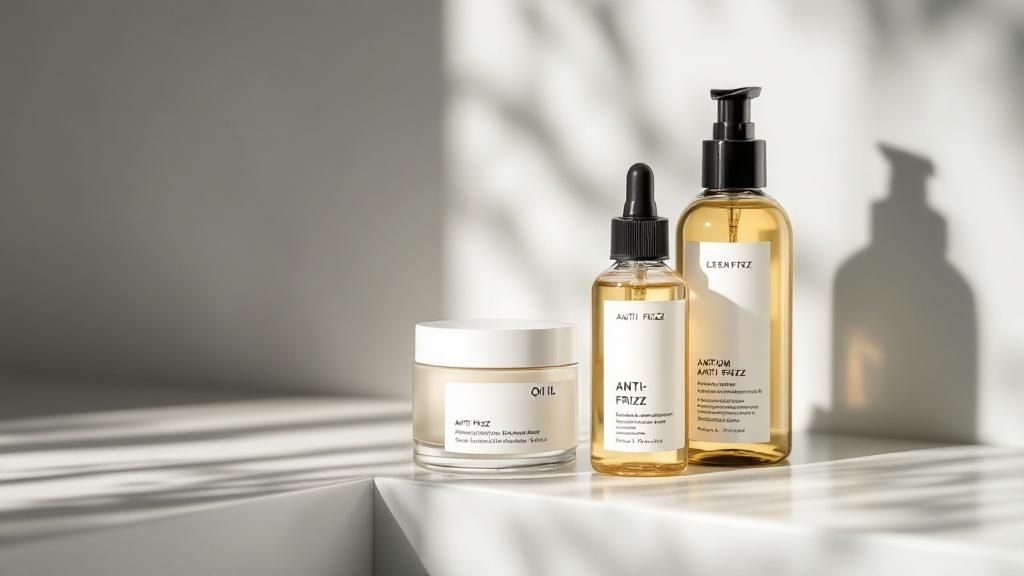
One of the most powerful—and most overlooked—tricks for taming frizz is a pre-wash treatment. Seriously, think of it like priming a wall before you paint. When you apply a nourishing oil or a specialised mask to your dry hair before it gets wet, you create a protective barrier.
This barrier does two brilliant things:
- It stops harsh detergents in your shampoo from stripping away all of your hair's natural, protective oils.
- It gives the hair shaft a deep dose of nourishment, making it far less thirsty for moisture from the humid air later on.
It’s easy to do. Just work a small amount of argan or coconut oil through your mid-lengths and ends about 30 minutes before you jump in the shower. This simple step gives your hair a head start on hydration, making it so much more resilient and less likely to fluff up.
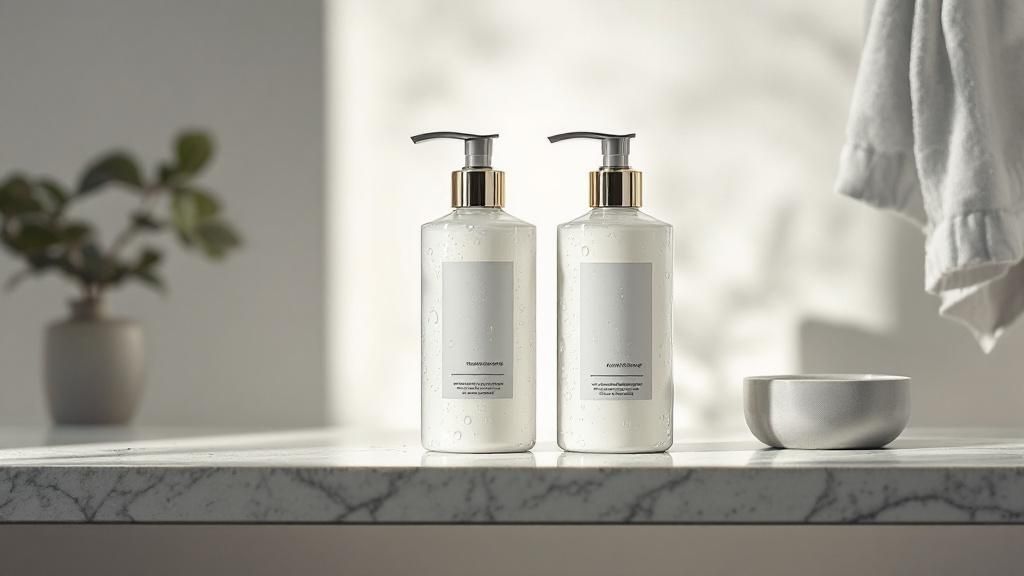
Choosing Your Cleansing Duo
Okay, let's talk about what happens in the shower. The products you use here are absolutely critical. Your best move is to find a good sulphate-free shampoo. Sulphates are the agents that give you that super-bubbly lather, but they can be incredibly drying, which is the absolute enemy of frizzy hair.
A gentle, sulphate-free formula cleans your scalp perfectly without stripping away that precious moisture. When you shampoo, try to concentrate the product just on your scalp and roots, where the oil and product build-up actually is. The suds running down the lengths of your hair as you rinse is more than enough to clean the ends.
Following that up with a deeply hydrating conditioner is completely non-negotiable. Look for ingredients like glycerin, which is a humectant that draws moisture in, and natural butters or oils that help seal it all in.
Pro Tip: Apply your conditioner only from the mid-lengths to the ends, keeping it away from the scalp. This stops your roots from getting greasy while making sure the driest parts of your hair get all the good stuff. Let it sit for at least a few minutes before rinsing to really let it sink in.
The Final Rinse Makes All the Difference
How you finish your wash is just as important as how you started it. Once you've rinsed out your conditioner thoroughly, give the tap a quick turn to cool for the final rinse. You don’t need an ice-cold shock—just a few seconds of cool (not freezing!) water is perfect.
This simple little action helps to slam the hair cuticle shut. When the cuticles are closed and flat, they create a smooth, reflective surface that not only looks shinier but is also much less vulnerable to the humidity that causes frizz. It's a tiny step that makes a massive impact, locking in all the moisture you just worked so hard to put in. Following these foundational steps is one of the best tips for maintaining healthy hair and the key to building a routine that finally gets frizz under control.
The Art of Applying Anti-Frizz Products
You can own the most celebrated anti-frizz products in the world, but if your application technique is off, you’re just pouring money down the drain. It’s true. How you apply your leave-ins, creams, and oils is where the real magic happens—it’s the difference between a sleek, polished finish and a sticky, frizzy mess.
This is your playbook for layering products on damp hair for maximum effect. I'll show you the right order and techniques to create a powerful, humidity-proof shield for your hair.
And it seems we're not alone in this fight. The Australian hair care market is tipped to hit US$1.07 billion in 2025, and a big part of that is our quest for frizz control. With around 45% of Australian women naming frizz as a top hair concern, especially in those humid coastal areas, it’s clear we’re all looking for solutions that actually work.
The Golden Rule of Product Layering
The most important thing to remember is this: apply your products from lightest to heaviest.
Think of it like skincare. You wouldn’t put a thick, heavy moisturiser on before a lightweight serum, right? Your hair works the same way. Lighter, water-based products need to go on first so they can properly penetrate the hair shaft and deliver that much-needed hydration. Then, you follow up with heavier, oil-based products to seal it all in and create a protective barrier.
So, here's how that breaks down in practice:
- First, Hydrate (Leave-in or Cream): Your first move after gently towel-drying is a leave-in conditioner or a lightweight cream. This is your foundation of moisture, quenching your hair's thirst so it’s less likely to soak up humidity from the air.
- Next, Style (Mousse or Gel): If you use something for hold or definition—like a mousse for volume or a gel for curls—this is when it comes on stage. These products give your hair structure while it dries.
- Finally, Seal (Serum or Oil): This is your crucial finishing touch. A quality hair serum or oil acts like a topcoat, smoothing down the hair cuticle and locking in all the goodness from the previous layers. This is what gives your hair that glossy, frizz-resistant finish.
Application Techniques That Make a Real Difference
Now that we have the what, let’s talk about the how. The way you apply your products can completely change your results. For instance, just raking products through your hair can sometimes break up your natural curl pattern and, ironically, create more frizz.
Instead, try one of these stylist-approved methods.
The "Praying Hands" Method
This technique is fantastic for distributing product evenly without messing with your hair's natural pattern, making it a go-to for wavy and curly types.
- Put a small amount of product in your palm.
- Rub your hands together, then place a section of your hair between your palms, like you’re praying.
- Gently glide your hands down the hair from root to tip.
This smooths the cuticle right down and ensures every strand gets a light, even coating.
The "Scrunching" Method
If you want to encourage and define your natural curls or waves, scrunching is your best friend.
- Apply the product to your palms first.
- Tip your head to one side or flip it upside down.
- Gently cup the ends of your hair and scrunch upwards toward the scalp, giving a light squeeze.
A Pro Tip From Experience: Please, resist the temptation to over-apply product! Start small—a ten-cent-piece-sized amount is usually enough. You can always add more if you need it, but you can’t take it away. Too much product just weighs your hair down and makes it look greasy, not sleek.
Understanding how humidity affects hair is a core part of winning this battle. For a deeper dive, check out our guide on how our hair battles flyaways and humidity. Once you master these application techniques, your anti-frizz products will finally work the way they're supposed to, giving you the power to control your hair no matter the weather.
Smart Drying Techniques for a Smooth Finish
How you dry your hair can either make or break your anti-frizz game. You can do everything right in the shower—using all the best moisturising shampoos and conditioners—only to have it all undone in minutes by a rough towel and a scorching hot blow-dryer. It’s time to rethink your drying routine, focusing on gentle methods that keep those hair cuticles happy and smooth.
The first rule of Frizz Club? Ditch the aggressive towel-rubbing. Seriously. Your standard terry cloth bath towel might feel soft on your skin, but its coarse loops create a ton of friction against your hair. That rubbing motion roughs up the hair's outer layer, the cuticle, and basically sends out an open invitation for frizz.
Instead, just gently squeeze and blot the excess water out. It's a tiny change that makes a massive difference.
Embrace Gentle, Hair-Loving Methods
A fantastic alternative to that standard towel is a soft, old cotton t-shirt or, even better, a dedicated microfibre hair towel. Their smoother surfaces absorb water just as well, but without creating that frizz-inducing friction. Trust me, making this simple swap is a game-changer if you're serious about winning the war on frizz.
Another brilliant technique, especially for those with wavy or curly hair, is “plopping.” It might sound a bit silly, but it’s an incredibly effective way to start the drying process while encouraging your natural texture to form beautifully.
Here’s how you do it:
- Lay a t-shirt or microfibre towel down flat on your bed or a chair.
- Flip your hair forward, letting it pile up neatly in the centre of the fabric.
- Grab the bottom edge of the fabric and pull it up and over your hair to the nape of your neck.
- Twist the sleeves (or the long sides of the towel) away from your face, then bring the twists back and tie them securely at the base of your neck.
Leave it on for 10-20 minutes. Plopping soaks up moisture without gravity stretching out and ruining your curl pattern. The result? More defined, far less frizzy hair once it's fully dry.
Master the Art of Blow-Drying
Look, sometimes you just need to use a blow-dryer. But doing it the right way is absolutely crucial. Blasting your hair on high heat is a fast track to a frizzy, damaged mess. The secret is to use the right attachments and a bit of technique to get that smooth, salon-quality finish at home.
Key takeaway: Always, always point the nozzle of the blow-dryer down the hair shaft, from root to tip. This simple action helps the cuticles lie flat, which is the secret to shine and smoothness. Aiming the airflow every which way just ruffles them up again.
Even if your hair isn't super curly, a diffuser attachment is your best friend. It spreads the airflow out, making it much gentler and preventing that "windstorm" effect that leads to flyaways. Stick to low-to-medium heat and speed settings. Yes, it takes a few extra minutes, but your hair's health is well worth the patience.
For more pro tips on handling humid weather, check out our guide on how to keep your locks frizz-free in humidity.
Explore Heatless Styling for Healthy Hair
Of course, the absolute best way to prevent heat damage is to avoid heat entirely. Heatless styling has come a long way from crunchy, wet-set curls, and there are some amazing options out there for creating gorgeous styles while keeping your hair healthy.
Before you even think about styling, remember that hydration is key. This is where pre-wash treatments shine.
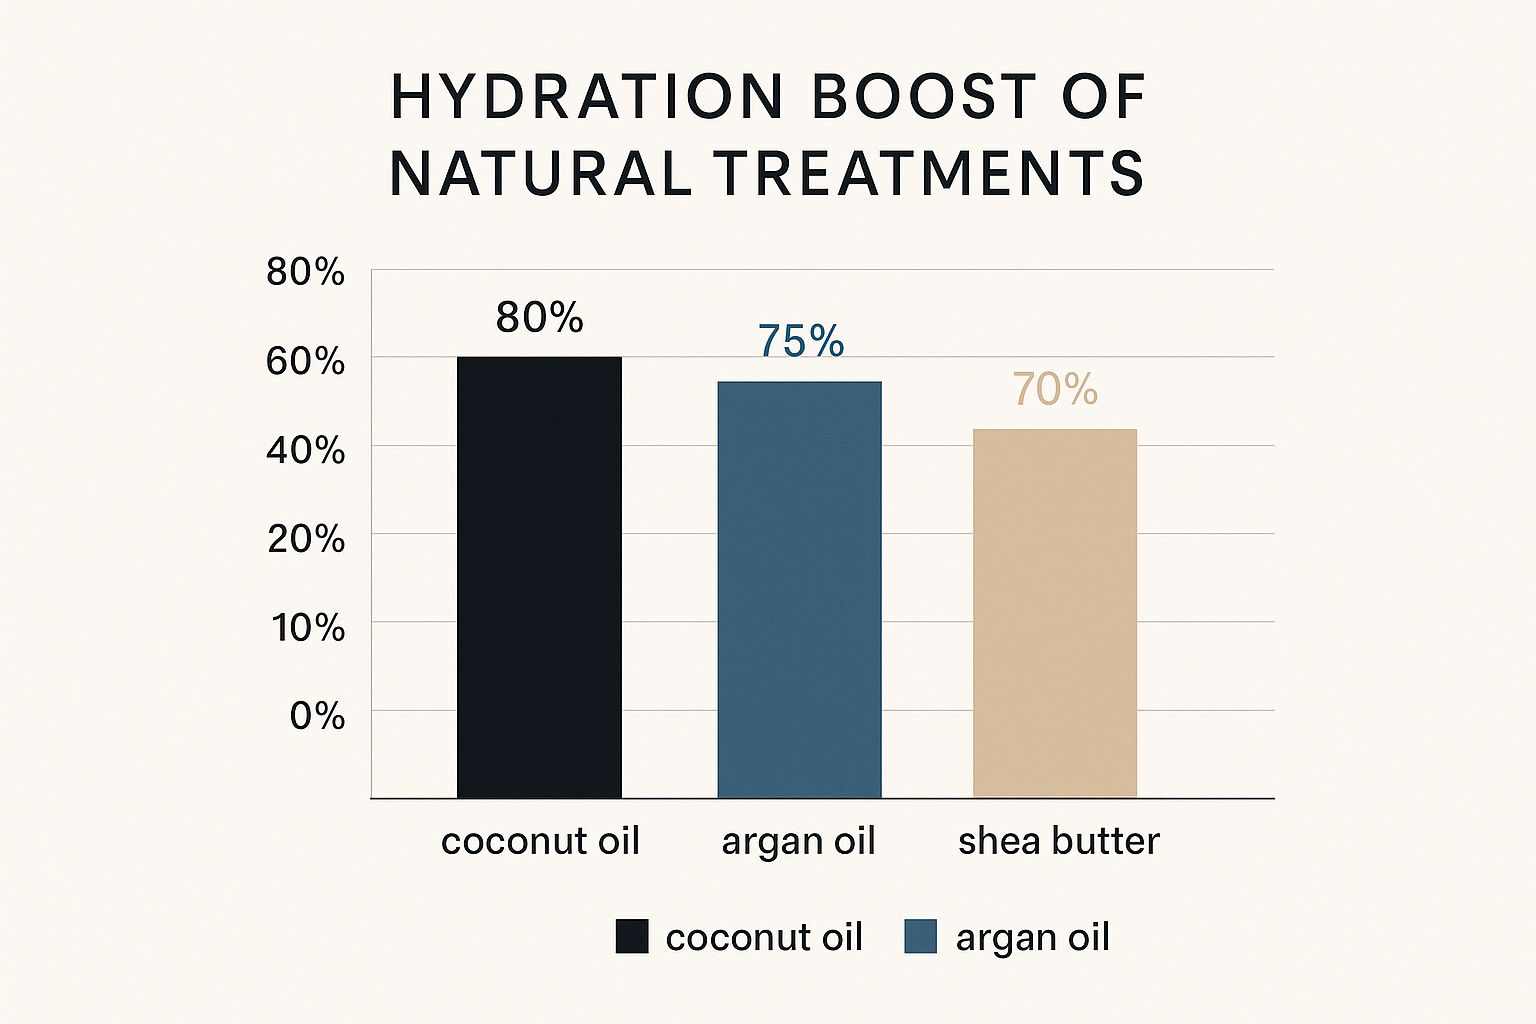
As you can see, natural oils like coconut and argan give your hair a serious hydration boost, setting a perfect foundation before you even pick up a towel.
When it comes to heat-free styling, give these a go:
- Silk or Satin Rollers: These aren’t your grandma’s foam rollers. Modern versions are incredibly gentle and can create everything from bouncy, voluminous curls to soft, glam waves while you sleep.
- Simple Braids: It doesn’t get easier than this. Braiding damp hair is a foolproof method for achieving beautiful, beachy waves without any heat at all. Two simple plaits are often all it takes.
By adopting these smarter drying techniques, you stop fighting a losing battle with your hair and start working with it to achieve that consistently smooth, glossy finish you're after.
Keeping Hair Smooth Between Washes
There's nothing worse than putting all that effort into a perfect blow-dry, only to have it look like a distant memory 24 hours later. The fight against frizz doesn't stop once the hair dryer is off; it’s really about what you do on days two, three, and even four that makes all the difference.
Extending that sleek, just-washed feeling is all about smart, gentle maintenance. The goal here is to protect the great work you've already done, shielding your hair from humidity, friction, and even yourself while you sleep. A few simple tricks can make your wash day efforts last so much longer.
Master Your Overnight Protection
Believe it or not, how you sleep can completely undo your anti-frizz game. All that tossing and turning on a regular cotton pillowcase creates a surprising amount of friction. Those cotton fibres grab onto your hair, roughing up the cuticle and leaving you with a frizzy halo and a mess of tangles come morning.
This is exactly why swapping to a silk or satin pillowcase is a genuine game-changer. I tell all my clients this! The silky-smooth surface lets your hair glide around as you move, which dramatically cuts down on that damaging friction. Honestly, this one simple switch is often the difference between waking up smooth and waking up to a frizzy disaster.
If your hair is particularly long or prone to tangles, you might want an extra layer of defence. A protective hairstyle for bed is the answer, and it doesn't need to be anything fancy.
- A loose 'pineapple' bun: Gently gather your hair right at the top of your head and secure it loosely with a silk scrunchie. This keeps most of your hair off the pillow entirely.
- A loose plait: A simple, relaxed braid is perfect for keeping your strands organised and preventing them from rubbing against each other and causing frizz overnight.
Both of these styles are brilliant because they minimise the amount of hair exposed to friction, helping you lock in that smooth style while you get your beauty sleep.
Refresh Your Style Without a Full Rewash
On the days between washes, your hair will likely need a bit of a touch-up, but that doesn't mean you have to jump back in the shower. A full rewash can actually be counterproductive, stripping your hair of its natural oils and often leading to more dryness and frizz. The trick is to refresh, not restart.
Instead of soaking your hair, just give it a light mist with water from a spray bottle. You’re not aiming for wet, just slightly damp. This is enough to wake up the products you've already used and make your hair a little more cooperative for a quick restyle.
The real secret to a good refresh is using a tiny—and I mean tiny—amount of product. Warm up just one or two drops of a lightweight hair serum or oil between your palms and gently smooth it over any frizzy bits or flyaways. It instantly tames any unruly sections and adds back a little shine without making your hair feel greasy or heavy.
This targeted approach lets you tackle problem spots without messing up the rest of your hair. It’s a quick, super-effective way to bring your style back to life in just a couple of minutes. For those who love a coordinated approach, exploring a dedicated product line can be a huge help. You can learn more about how a shampoo, conditioner, and styling treatment system can work in synergy for lasting smoothness.
By making these simple habits part of your routine, you can genuinely extend the life of your sleek, frizz-free style. It’s all about working smarter, not harder, to keep your hair looking its best long after wash day.
Your Frizzy Hair Questions, Answered
Still have a few lingering questions about how to get a handle on frizz? Don't worry, you're in good company. The path to smoother hair usually involves a bit of trial and error. To help you along, I’ve gathered some of the most common questions I hear and broken down the answers.
Does Cutting My Hair Actually Help With Frizz?
Yes, absolutely! Getting regular trims is one of the single best things you can do for frizz. Think about it: split ends are literally damaged, frayed bits of hair. When the ends are split, they simply can't lie flat, which creates that fuzzy, unruly look we all know and dislike.
Snipping those ends off every 6-8 weeks gets rid of the driest, most compromised part of your hair. The result is an instant improvement—your hair looks and feels smoother and healthier right away. While a haircut won't magically change your hair's natural texture or stop frizz from ever happening again, it's a non-negotiable step for keeping it under control.
Are Silicones Really as Bad as People Say?
This is such a hot topic, and the truth is, it’s not a simple yes or no. Silicones can be absolute powerhouses for fighting frizz. They work by creating a super-lightweight coating around each hair strand, acting like a tiny raincoat to seal out humidity and give your hair that incredible sleek, glossy feel.
The real secret is knowing which silicones to use. Here's a quick guide:
- Water-Soluble Silicones: These are your best mates. On an ingredient list, look for names that include "PEG" or "PPG". They do their job beautifully and then rinse away clean with water, so you don't have to worry about buildup.
- Non-Soluble Silicones: These are the ones you need to be a bit more strategic with. Heavier silicones (like Dimethicone) can build up on the hair over time. Eventually, this can weigh your hair down and, ironically, block precious moisture from getting in.
If you find a product with non-soluble silicones that your hair just loves, don't ditch it! Just be sure to work a good clarifying shampoo into your routine every few weeks. It acts like a reset button, washing away any residue and letting your hydrating products get back to work.
So, please don't write off all silicones. When you know what you're looking for, they can be an amazing tool in your anti-frizz arsenal.
I've Tried Everything, Why Is My Hair Still Frizzy?
Hitting a wall after you feel like you've done all the right things is incredibly frustrating. If you're still seeing that halo of frizz, there might be a few less-obvious culprits at play.
One of the biggest hidden factors I see is water quality. Hard water, which is full of minerals like calcium and magnesium, can leave a film on your hair. This mineral buildup physically blocks your carefully chosen products from penetrating the hair shaft. For many people, a simple showerhead filter can be a total game-changer.
Another thing to consider is your hair's porosity. If you have low-porosity hair, the cuticles are shut tight, making it tough for moisture to get in. Products often just sit on the surface. On the flip side, high-porosity hair has wide-open cuticles. It drinks up moisture easily but loses it just as fast, leaving it constantly thirsty and frizz-prone. You might need to tweak your routine to cater to your specific porosity level.
And finally, remember that consistency is everything. It can take several weeks of a dedicated, hydrating routine to really see a lasting change. Be patient with your hair and the process.
Can I Use Hair Oil Every Day to Control Frizz?
You sure can, but the trick is all in the technique. A daily touch of hair oil can be a lifesaver for taming flyaways and sealing in moisture between washes, as long as you apply it correctly for your hair type.
Here’s how to approach it:
- For Fine Hair: Less is always more. A single drop of a lightweight oil (think grapeseed or almond oil) is often all you need. Focus it only on the very ends to calm static without making your hair look greasy.
- For Thicker or Very Dry Hair: Your hair might love a daily dose of a slightly richer oil, like argan or jojoba. This will help to keep the cuticle sealed, locking in moisture and keeping your hair supple.
The most important rule? Start small. Always begin with one or two drops, warm them up between your palms, and then gently skim your hands over the frizzy areas. You can always add more, but you can't take it away! Finding that sweet spot is the real key to daily frizz control.
Ready to build your ultimate anti-frizz toolkit? At On Line Hair Depot, we offer a huge selection of professional-grade products designed to give you the smooth, healthy hair you deserve. From moisturising shampoos to sealing serums, find everything you need at https://onlinehairdepot.com.


