
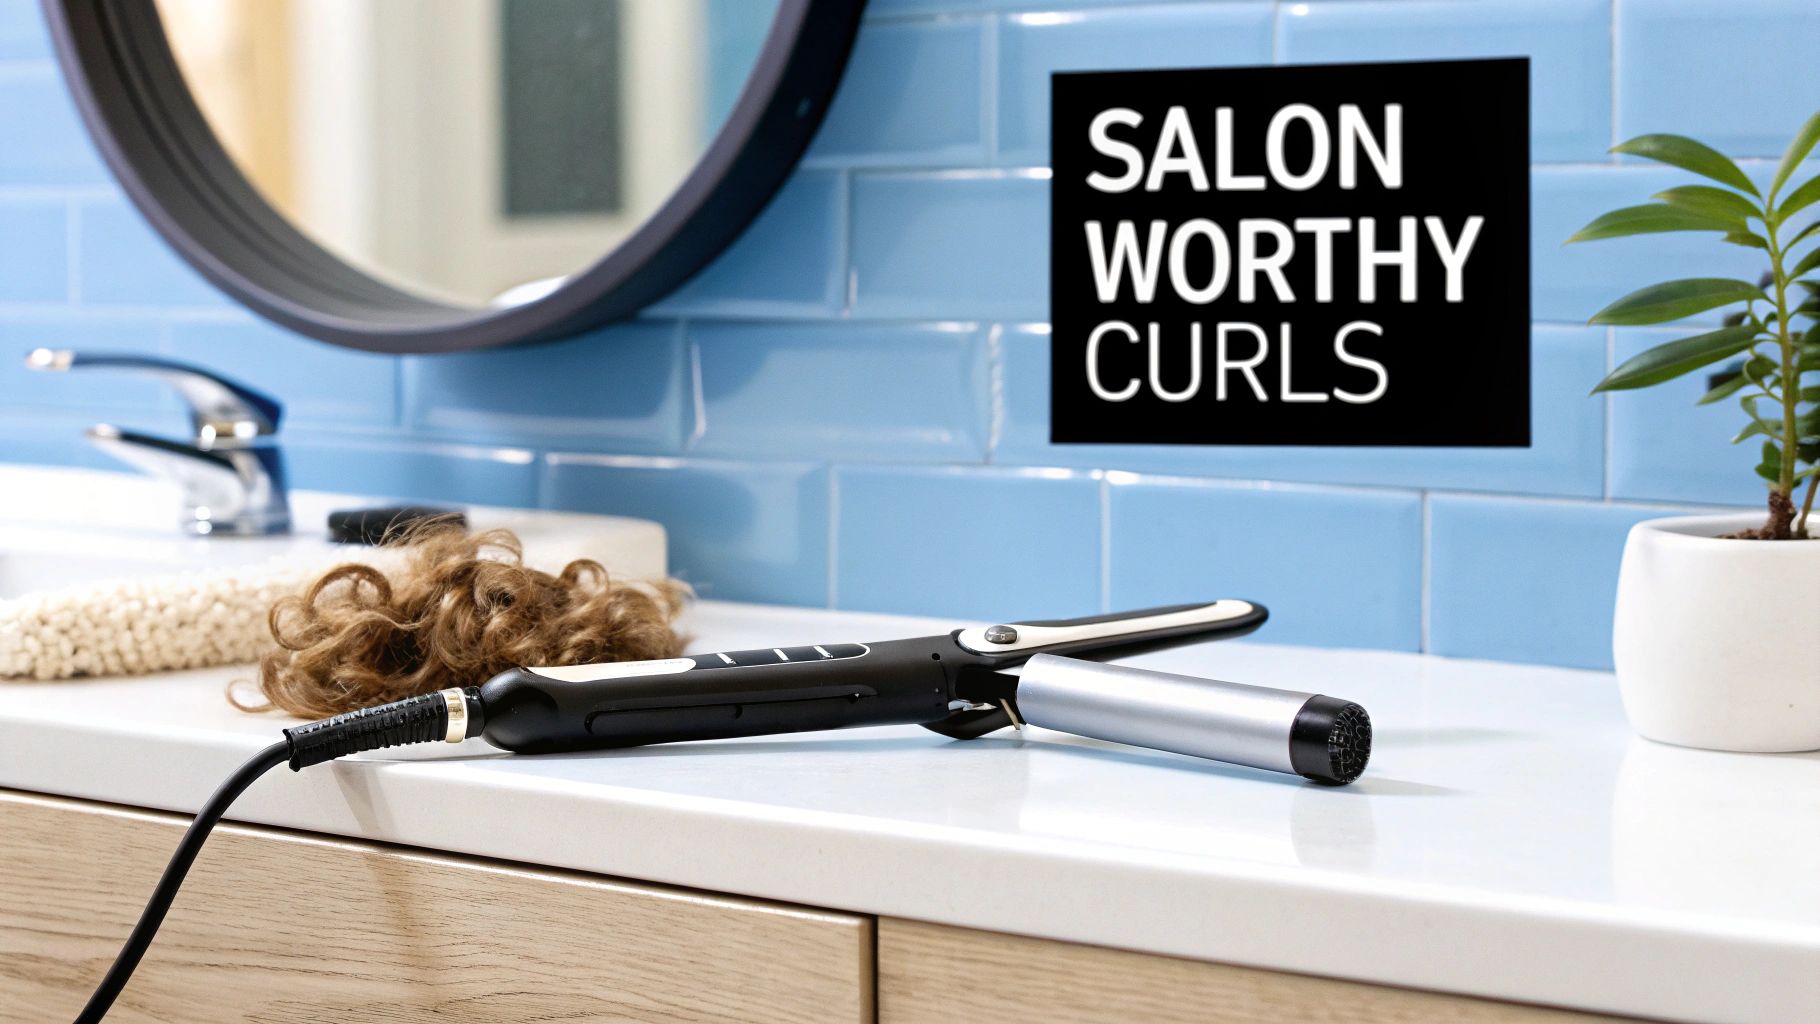
Getting those incredible, salon-perfect curls at home isn't some dark art. It really just comes down to knowing a few key tricks of the trade: prepping your hair the right way, picking the perfect tool for the job from our collection, and finishing with a flourish to make sure your style sticks around.
Let's Finally Nail That Perfect Curl
We've all been there. You spend ages with a curling wand, painstakingly twisting every strand of hair, feeling like you're creating a masterpiece. Then, you step outside, and poof—it all goes limp before you've even had your first coffee. It’s maddening, and it's a story we hear all the time.
This is where that cycle of frustration ends. Think of us as your personal hair gurus, ready to spill all the pro secrets. We're going to ditch the guesswork and get you on the path to creating stunning, long-lasting curls, every single time, using our specially selected products.
What We're Going to Cover
Forget curls that drop in five minutes. We’re diving into the absolute essentials—the stuff stylists swear by—so you can get that fresh-from-the-salon look in your own bathroom. We'll walk you through everything, using our favourite products from the Online Hair Depot range.
Here’s a sneak peek at what you'll learn:
- The must-do prep work that creates the perfect foundation for curls with real staying power.
- How to choose the right curler from our collection for your hair type and the look you’re dreaming of.
- Our go-to step-by-step techniques for everything from cute, tight ringlets to those effortless beachy waves.
- Finishing touches that lock in your style and keep it looking amazing all day (and all night).
It's no surprise that so many people want to master at-home styling. When you have the right tools and knowledge, you can achieve professional results without the hefty salon bill.
By the time you're done here, you won't just know how to curl your hair. You'll understand the 'why' behind every step. That's the real secret to tackling any hair day and getting the gorgeous curls you’ve always wanted.
To make sure these tips are super clear and easy to follow, we even brushed up on the latest content creation best practices.
The Pre-Curl Prep That Changes Everything

Let’s get one thing straight: perfect curls are never a happy accident. They’re built on a killer foundation. The real magic isn’t just in the wand you’re wielding; it's all about what you do before a single hot tool gets near your head. This is the stage that separates curls that disappear in an hour from curls that look amazing all night.
Many stylists will tell you that slightly "lived-in" or day-two hair is the ultimate canvas for curling. Why? Because freshly washed hair is often way too soft and silky, causing those beautiful curls to slip right out. The natural oils and texture from the second day give your hair the perfect amount of grit to hold a style.
But what if you've just washed your hair and need fabulous curls now? Don't stress, you can absolutely fake it. A light spritz of a quality texturising spray from our collection will give your clean strands that necessary grip. It’s like giving your hair a bit of memory, reminding it to hold the beautiful shape you're about to create.
Your Absolute Non-Negotiable First Step
Before you even think about turning on that curler, there is one golden rule: always use a heat protectant. This is not optional. Think of it like sunscreen for your hair; you wouldn't spend a day at the beach without it, and you definitely shouldn't expose your hair to 200°C heat without a shield.
To get it right, lightly mist one of our heat protectant sprays all over your dry hair from about 15-20 centimetres away. Don't just spray the top layer! Lift sections of your hair and spray underneath to make sure every single strand gets coated. This creates an even barrier that protects against damage, breakage, and even colour fading.
The right prep is more than just protection; it's insurance for your style. A great heat protectant not only guards against damage but also helps to smooth the hair cuticle, which means less frizz and a glossier finish on your final curls.
This focus on protection is huge. Customers are increasingly aware of the importance of hair health, which is why our product range is built around effective styling that also cares for your hair.
Building Body and Grip Before You Curl
Once your hair is protected, it's time to add some muscle to your style. This is where a couple of other prep heroes from our product lineup come into play.
If your hair is fine or tends to be a bit slippery, a lightweight mousse is your best friend. Work a golf-ball-sized amount through your damp hair before blow-drying. Our formulas are designed to add body and volume without that sticky, crunchy feeling you might remember from the '90s.
Alternatively, for hair that just won’t hold a curl, a texturising spray is essential. These products give your strands the "tooth" they need to hang onto the curl's shape. You'll be amazed at the difference a little bit of prep makes in the longevity of your style.
For a deeper dive into safeguarding your strands, check out our guide on using heat protectant for healthy, glossy hair. Mastering these simple prep steps truly changes everything.
Choosing Your Perfect Curling Tool
Picking the right curling tool is pretty much the most important decision you'll make for the final look of your curls. Seriously, it's a game-changer. Think of this as your personal cheat sheet for our collection, designed to cut through the noise and help you find the one. From classic curling irons with clamps to those sleek, modern clipless wands, each tool crafts a completely different vibe.
The secret to getting a specific curl style almost always boils down to one thing: barrel size. It's the difference between tight, bouncy ringlets and those relaxed, "oh, I just woke up like this" waves. Let's find your styling soulmate from the Online Hair Depot collection.
Barrel Size: The Blueprint for Your Dream Curl
The diameter of your curler's barrel is what dictates how tight your curls will be. It's a simple formula: a smaller barrel gives you a tighter curl, while a larger one creates a looser, more relaxed wave. Simple as that.
This quick guide shows you exactly how our different barrel sizes create distinct styles.
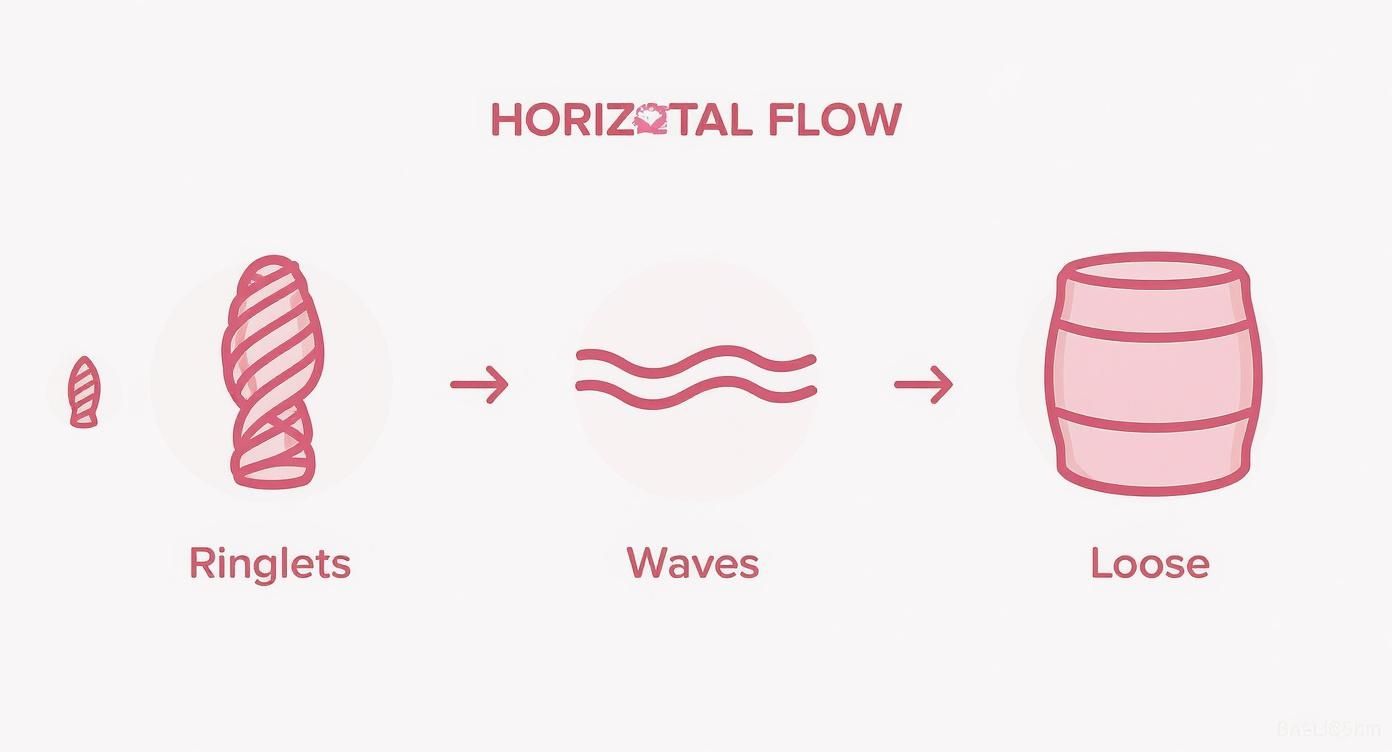
As you can see, matching the barrel size to the look you're after is your first step towards styling victory. Whether you're craving tiny ringlets or big, flowing waves, it all starts here.
Let's get into the specifics with our most popular options:
- The 19mm Barrel: This skinny barrel is your secret weapon for creating defined, springy ringlets and super-tight curls. It’s absolutely brilliant for shorter hair or if you’re aiming for a seriously high-volume, curly look.
- The 25mm Barrel: Meet the all-rounder! A 25mm barrel is the most versatile of the bunch, perfect for crafting everything from classic, bouncy curls to more chilled-out beachy waves. If you’re only going to own one tool, this is a fantastic choice.
- The 32mm Barrel: Dreaming of soft, loose, flowing waves? The 32mm barrel is about to become your new best friend. It delivers that effortless, voluminous style you see all over Instagram, and it works wonders on medium to long hair.
What’s Your Curler Made Of?
Okay, so size is sorted. But what about the material your curler is made from? This is a big deal, affecting both the health of your hair and the quality of your curls. Different materials have their own unique perks, and we’ve handpicked our collection to have something for every hair type and need.
Think of your curling tool's material like the fabric of your clothes. You wouldn’t wear a woolly jumper on a hot day, right? In the same way, you shouldn’t use the wrong material on delicate hair. Getting this right means a better result and, most importantly, protected hair.
Here’s a look at the top-tier materials you’ll find in our range:
- Ceramic: Famous for its ability to distribute heat evenly, ceramic is a fantastic choice for preventing those damaging hot spots. It glides through the hair like a dream, cutting down on snagging, making it a great all-rounder for most hair types.
- Tourmaline: Think of this as ceramic's frizz-fighting cousin. Tourmaline-coated barrels emit negative ions that neutralise the positive ions found in dry or damaged hair. This helps to seal the hair cuticle, locking in moisture and leaving your curls looking extra shiny and smooth.
- Titanium: This is the powerhouse material. Titanium heats up incredibly fast and holds a consistent high temperature with ease. This makes it the go-to for thick, coarse, or stubborn hair that needs a bit more oomph to hold a style.
Choosing Your Curler From Our Collection
Ready to meet your match? This table breaks down our range to help you find the perfect tool for your hair type and the style you're dreaming of.
| Tool Type | Barrel Size (mm) | Best For Curl Style | Ideal Hair Type |
|---|---|---|---|
| The Spring Curler | 19mm | Defined Ringlets & Tight Curls | Fine to Medium, Shorter Hair |
| The Everyday Wave Wand | 25mm | Classic Curls & Beachy Waves | All Hair Types, Medium Length |
| The Volume Curler | 32mm | Loose Waves & Voluminous Body | Medium to Thick, Longer Hair |
| The Pro Titanium Tong | 25mm & 32mm | Long-Lasting Curls & Waves | Thick, Coarse, Hard-to-Curl |
By putting this knowledge of barrel size and material together, you can now confidently browse our website's collection and pick the perfect tool. You're now fully equipped to create flawless, healthy-looking curls, every single time.
Time to Master Your Curling Technique
https://www.youtube.com/embed/vgTwP2-Ha7E
Alright, let's get into the good stuff—actually making those gorgeous curls happen. The secret to a flawless, salon-quality finish isn't some crazy, complicated trick. It all comes down to a consistent technique, and believe it or not, it starts before the hot tool even touches your hair. The magic is in the sectioning.
Stop grabbing random, uneven chunks of hair! If you want curls that look uniform and actually last, you need a game plan. The simplest and most effective way to do this is what we stylists call the "four-quadrant" section.
Just part your hair straight down the middle, from your forehead all the way to the nape of your neck. Then, create another part going horizontally from ear to ear. Boom. You've got four clean, manageable sections to work with, which means no strand gets left behind.
The Art of the Wrap
Now that your hair is sectioned like a pro, it’s time to get curling. How you wrap your hair around the barrel is what truly defines the final look, whether you’re aiming for classic glamour or those effortless, relaxed waves.
-
The Classic Clamp-and-Wrap: This is your go-to for those polished, bouncy curls you get with a traditional curling iron. Take a one-inch section and clamp it a few inches up from the ends. Wind the hair up towards the root, hold, and then gently tap the clamp open and closed as you slide down to the ends. This gives them a beautiful, smooth finish.
-
The Modern Wand Wrap: If you're chasing that relaxed, beachy vibe, a clipless wand is your best friend. Hold the wand with the tip pointing down and wrap a section of hair flat against the barrel. The key here is to leave the last inch or so of your ends out of the wrap for a more modern, undone look. For a deep dive into this popular method, make sure you check out our complete guide on how to curl hair with a curling wand.
Here's a little trick that makes a world of difference: alternate the direction you curl each section. Wrap one piece away from your face, and the next one towards it. This simple move breaks up any stiff patterns and creates incredible, natural-looking movement and volume. It’s the easiest way to avoid that overly uniform, doll-like look.
Heat and Hold Time: Getting It Just Right
Nailing the right temperature is a balancing act between protecting your hair and making sure your style lasts all day. Too cool, and your curls will fall flat in an hour. Too hot, and you're risking unnecessary damage. Our tools offer variable heat settings for this very reason.
- Fine or Treated Hair: Keep it gentle. You’ll want to stay in the 150°C–175°C range.
- Normal, Healthy Hair: Your sweet spot is likely around 175°C–200°C.
- Thick or Coarse Hair: Your hair might need a bit more convincing, so you can go up to 200°C–220°C to really lock that style in.
Our best advice? Always start on a lower setting. You can always bump it up a notch if you find your curls aren't holding.
So, how long do you keep the hair on the barrel? There's no single magic number, but a solid rule of thumb is anywhere from 8 to 12 seconds. Listen to your hair—if you smell anything other than your heat protectant, release it immediately.
Once you unwrap the hair, don’t just let it fall. Catch the fresh curl in the palm of your hand and let it cool for a few seconds. This one tiny step makes a massive difference in how long your curls will last. Seriously, try it.
Finishing Touches for Curls That Last

Alright, you’ve put in the work and your head is covered in beautiful, bouncy curls. High five! But now comes the most important part: making sure they actually stick around long enough to be seen. The first few minutes right after you've used the curling iron are make-or-break. This is where you lock it all in.
The golden rule for curls that don’t quit? Let them cool down completely. I can’t stress this enough. A curl only truly sets once the hair cools and the cuticle closes in that new, fabulous shape. If you touch, brush, or even look at them the wrong way while they're still warm, you're on a fast track to droopy, sad waves.
The Power of the Pin Curl Set
For maximum, bulletproof hold—especially if your hair has a mind of its own and loves to fall flat—you need to get pinning. As you release a fresh curl from the barrel, don’t just let it drop. Catch it in the palm of your hand and gently roll it back up towards your scalp.
Secure that little coil with a bobby pin or a small clip. Do this for every single curl, and yes, you'll look a bit wild for a few minutes, but trust me. Letting them cool in this pinned-up state for just 10-15 minutes is a total game-changer.
This simple trick gives your curls structure and memory. Think of it like letting a cake cool before you try to frost it—mess with it too early and the whole thing collapses. A little patience here pays off with a style that holds for hours, not minutes.
Mastering techniques like this at home is why so many of our customers are building their own styling arsenals. We believe that with the right tools from our store, getting those pro-level results yourself is a special kind of magic.
To Comb or Not to Comb
Once every curl is completely cool to the touch, it's time for the big reveal. Gently let them all down. Now you have a choice to make, and it’s one that will totally define your final look.
How you break up the curls changes everything:
-
For a soft, piecey vibe: Just use your fingers. Gently rake them through your hair to loosen the curls. This creates a really natural, slightly undone finish and is perfect for keeping the definition in tighter curls.
-
For uniform, glam waves: A wide-tooth comb is your best friend. Combing gently through the curls will marry them together, creating those elegant, red-carpet-worthy waves. Just promise me you won’t reach for a fine-tooth comb or a brush—that’s a recipe for frizz city and will completely ruin the shape you worked so hard for.
Your Final Lock-It-In Routine
The last piece of the puzzle is picking the right finishing product from our collection to seal the deal. You’re looking for something that offers hold without that awful stiff, crunchy feeling.
Start with a light misting of our Flexible-Hold Hairspray. Hold the can about 30 centimetres away from your head and spray all over. This will tame any little flyaways and give you a touchable hold that still lets your hair move naturally.
For that final pop of healthy radiance, finish with our Gloss & Shine Spray. It adds a gorgeous, lightweight lustre that makes your curls look incredibly vibrant without ever weighing them down. It’s the secret to that “I just left the salon” gloss.
And if you're after something a bit more textured and lived-in, a quick spritz of salt spray can do wonders. Our sea salt spray guide has all the tips you need to nail that effortless, just-back-from-the-beach look.
Your Common Curling Questions Answered
Even when you’ve followed all the steps to a T, hair sometimes has a mind of its own. Don't stress, we've all been there! Let's tackle some of the most common curling dramas so you can troubleshoot your way to a flawless finish.
Why Do My Curls Fall Out So Quickly?
This is the big one, isn't it? The answer nearly always boils down to three things: prep, heat, and cooling. If your hair is squeaky clean and silky soft, the curls have nothing to grab onto. Always give your hair a bit of grit first with a texturising product from our range – it gives the strands some memory.
Also, have a look at your heat settings. If the tool isn't hot enough for your hair type, the style just won't set. But the real game-changer? Letting each curl cool down completely before you touch it. A warm curl is still mouldable; letting it set in your hand or pinning it up for a moment is what locks the shape in for good.
Think of it like baking a biscuit. If you grab it straight from the oven, it’s soft and just falls apart. You have to let it cool on the rack to get crispy. Your curls work the exact same way. Patience is everything!
Which Temperature Is Right for My Hair?
Finding that temperature sweet spot is the key to a style that lasts without frying your hair. This is definitely not a one-size-fits-all situation.
- Fine or Colour-Treated Hair: Keep it on the lower side, somewhere around 150°C to 175°C.
- Normal, Healthy Hair: Your happy place is probably between 175°C to 200°C.
- Thick or Coarse Hair: For stubborn hair that fights the curl, you might need to dial it up to 200°C to 220°C.
The golden rule is to start low and only turn up the heat if your curls genuinely aren't holding. And just a reminder: our heat protectant spray is non-negotiable, no matter what temperature you're using.
How Do I Avoid Those Weird Clamp Marks?
Ah, the dreaded clamp crimp! It's the fastest way to ruin an otherwise perfect curl. The secret is to stop clamping the very ends of your hair from the get-go. Instead, start wrapping the hair around the barrel from the mid-shaft down.
As you wrap, keep a light touch on the clamp, letting it glide smoothly down the hair shaft as you go. This technique actually smooths the hair as it curls, which gets rid of any potential kinks. Of course, for a foolproof solution, you could check out our range of clipless curling wands. They take the clamp out of the equation entirely, giving you a stunning, seamless finish every time.
At On Line Hair Depot, we reckon everyone deserves a great hair day. With the right gear and a few insider tricks, those salon-worthy curls are well within your reach.
Explore our full collection of professional-grade curling tools and styling products today at https://onlinehairdepot.com.


