
Let’s be real for a second. Squeezing in a salon appointment just for a tiny trim can be a massive pain. But the secret to seriously healthy, gorgeous hair is no secret at all: a quick snip every 6-12 weeks to keep those pesky split ends from taking over.
What if I told you that you could nail that fresh-from-the-salon feeling right in your own bathroom? With the right gear from Online Hair Depot and a little know-how, you can. You'll save a heap of time and money, too.
Why a Home Hair Trim Is Your New Best Friend
Taking the scissors into your own hands is about more than just dodging a salon visit; it’s about taking back control. You get to decide exactly how much comes off, which means you can officially say goodbye to that heart-sinking moment when the stylist chops off way more than you asked for.
Forget all those botched-fringe horror stories you've seen online. This guide is your new playbook, designed to make you feel like a pro before you even make the first cut. We're here to walk you through trimming your hair with total precision, using simple techniques and the kind of top-notch tools you can find right here at Online Hair Depot. Once you've got this skill down, you can zap frayed ends the second they appear instead of waiting weeks for an opening in your hairdresser's calendar.
The Power of a Maintenance Trim
Okay, first things first: we need to be clear that we're talking about a maintenance trim, not a full-blown restyle. A trim is all about keeping your current shape looking sharp and your ends healthy. It’s the small, consistent tune-up that makes all the difference in the long run. Think of it like weeding a garden—a little bit of regular effort prevents a huge, tangled mess later.
Mastering a simple trim means you're stopping breakage in its tracks before it can travel up the hair shaft. Honestly, this one little habit is the single best thing you can do to help your hair grow longer and stronger, because you're only getting rid of the damaged bits.
Getting into the habit of a regular at-home trim comes with some awesome perks:
- Seriously Healthier Hair: Snipping away split ends stops them from splitting even further up your hair. This keeps your locks looking and feeling thicker and way more resilient.
- More Money in Your Pocket: Let's face it, salon visits add up fast. Trimming at home frees up your budget, so you can splash out on amazing, high-quality products from our store instead.
- Ultimate Convenience: No more trying to fit an appointment into your chaotic schedule. You can give your hair the TLC it deserves whenever you have a spare moment.
This guide is all about mastering that maintenance trim—the art of keeping your hair looking absolutely fabulous between those bigger, more dramatic cuts. We’ll give you the confidence to make those small, super-effective snips that truly make a world of difference.
Getting Your Hands on the Right Gear from Our Store
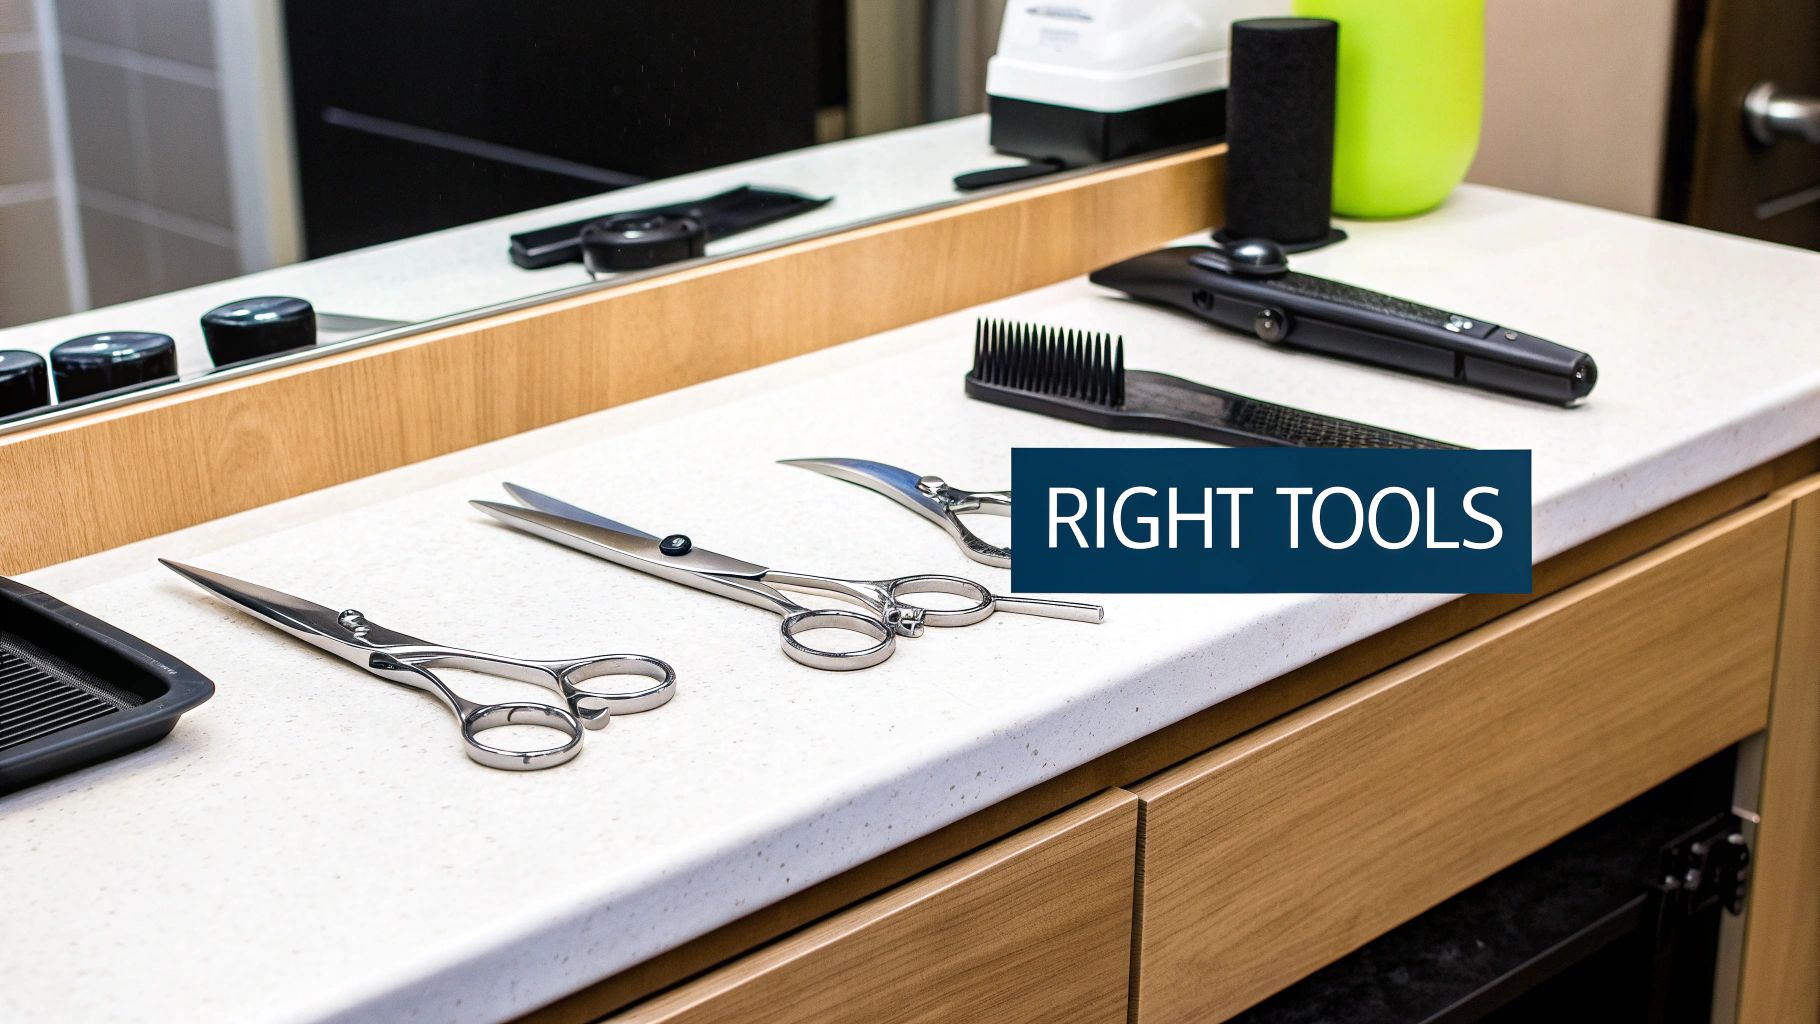
Alright, before you make a single snip, let's talk tools. I can’t say this enough: step away from the kitchen scissors! They’re designed for cardboard and chicken, not your delicate strands. Using them is the fastest way to chew through your hair, which is a one-way ticket to a head full of fresh split ends.
Getting set up with the right gear from Online Hair Depot isn’t just a nice-to-have; it's the absolute foundation for a haircut you’ll actually be happy with. Think of this as your personal shopping list for building a pro-level kit at home.
Your Must-Have Hair Trimming Toolkit from Our Store
We've put together a quick checklist of the essentials you'll need for a flawless at-home trim. You can find all of these professional-grade tools right here in our store, curated to give you salon-quality results without the salon price tag.
| Tool | Why You Need It From Our Collection | Best For |
|---|---|---|
| Professional Hair Shears | Made from high-quality steel, our shears give a razor-sharp, clean cut that prevents split ends. | All hair types needing a precise, clean trim. |
| Sectioning Clips | These high-grip clips hold hair securely without snagging, letting you work with manageable sections. | Keeping hair neat and organised while you cut. |
| Professional Comb | Our anti-static carbon combs create clean partings and provide perfect tension for an even cut. | Creating straight lines and controlling flyaways. |
| Protective Cape | A lightweight cape keeps hair off your clothes and skin, making cleanup a breeze. | A mess-free and itch-free trimming experience. |
| Hair Clippers | Our top-rated clippers are perfect for creating sharp lines and cleaning up necklines. | Bobs, fringes, and short hairstyles. |
Having these tools on hand is the secret to making your DIY haircut feel less like a risky experiment and more like a proper pampering session.
The Heart of Your Kit: Proper Hair Shears
The absolute star of the show is a pair of professional-grade hair-cutting shears. The difference is night and day. Our shears are crafted from high-quality steel and are incredibly sharp, which is exactly what you want for a clean, precise cut. This precision is what prevents damage and seals your ends, rather than fraying them into a mess.
A clean cut from proper shears is what makes a trim last. It’s the difference between healthy maintenance and accidentally causing more split ends than you started with.
When you invest in a quality pair from our collection, you're really investing in your hair's long-term health. They hold their edge for ages, giving you a reliable tool you can count on trim after trim.
Your Trusty Sidekicks for a Perfect Cut
Beyond the shears, a few other goodies from our store will make the whole process smoother and give you that polished, professional finish.
- Sectioning Clips: Honestly, our high-grip clips are a game-changer. They hold even thick hair firmly in place without snagging, letting you focus on one small, manageable section at a time for a perfectly even result.
- A Professional Comb: Don't underestimate a good comb. It’s essential for creating clean partings and holding the hair with just the right amount of tension as you cut. For extra control, check out our anti-static carbon combs—they’re brilliant for taming flyaways, especially if you’re cutting your hair dry.
- A Protective Cape: Do yourself a favour and grab one of our lightweight capes. It keeps those tiny, itchy hairs off your neck and clothes, making the experience feel way more organised and a lot less messy.
And of course, prepping and finishing your hair properly is just as important. The right brush makes all the difference. To find the perfect match for your hair type, have a look at our ultimate guide to Duboa hair brushes.
Don’t Forget the Power of Hair Clippers
Clippers aren't just for buzz cuts anymore! The versatility of a good set of hair clippers is often overlooked. Our best-selling clippers are amazing for creating those ultra-sharp, blunt lines on a bob, tidying up a fringe, or cleaning up the neckline on shorter styles. For certain looks, they offer a level of precision that’s tough to get with shears alone.
More people are discovering the confidence and convenience that comes with having quality tools on hand. The trend towards at-home grooming is booming, and our range of professional-grade clippers makes it easy to achieve sharp, clean lines right in your own bathroom.
Getting Your Hair Ready for the Big Snip
A great haircut doesn't just happen the moment you pick up the scissors. Honestly, the real magic happens before you even make that first cut. Getting the prep work right is the secret sauce to a smooth, predictable, and (most importantly) panic-free trim. Think of it as creating the perfect canvas for your hair masterpiece.
The first question I always get is, "Should I cut my hair wet or dry?" There's no single answer here—it really boils down to your hair type and the style you're going for. Let's break down the pros of each so you can make the right call.
The Great Debate: Wet vs. Dry Trimming
For anyone with straight or even slightly wavy hair, cutting it while it's damp is fantastic for getting those razor-sharp, precise lines. The water gives the hair a bit of weight, which creates a consistent tension and makes it a whole lot easier to snip a perfectly straight, blunt edge. A good professional comb from our collection will just glide right through, making your guide line crystal clear.
But, if you're blessed with curly or coily hair, a dry cut is your new best friend. Seriously. Trimming your hair in its natural, dry state lets you see exactly how each curl is going to sit and spring up. This is the only way to avoid that dreaded post-cut shrinkage shock and make sure the final shape is balanced and gorgeous.
When it comes to curly hair, cutting it dry is non-negotiable. You're working with its natural pattern, not fighting against it. This is how you avoid that awkward "triangle" shape and get a style that actually flows and looks amazing.
Whichever path you choose, one thing is certain: you need to start with clean hair.
Setting Up Your At-Home Salon
Your environment makes a massive difference to how your trim turns out. You don't need a high-end salon setup, just a few simple things to keep the process organised and stress-free.
- Let There Be Light: Find the brightest spot in your house. Good lighting is everything because it kills shadows, helping you spot every last stray hair and ensuring your lines are perfectly even. Natural daylight from a window is the absolute best.
- The Two-Mirror Trick: To get that crucial 360-degree view, you'll need your main bathroom mirror and a handheld one. This is the only way to properly check the back and sides to prevent any lopsided mishaps.
- Start with a Clean Slate: Always, always begin with freshly washed and conditioned hair. Using a quality shampoo and conditioner from our range gives you a clean, tangle-free base, which makes sectioning and cutting so much easier. If you're dealing with some serious knots, our guide on how to detangle matted hair has some pro tips to get you started smoothly.
Time to Make the Cut: Nailing the Basics
Okay, deep breaths. This is it—the moment of truth! Let's get down to the actual snipping. Forget all those intimidating, fancy techniques you see in salons. We're going to stick with a few simple, foolproof methods that will give you a clean, gorgeous trim every single time. The real secret to a great home haircut isn't some complex skill; it's simply about control.
And how do you get control? By not trying to tackle your entire head of hair at once. That's a one-way ticket to a wonky, uneven disaster. Instead, grab some professional-grade sectioning clips from our store and divide your hair into small, manageable sections. This little bit of prep work ensures every strand gets the attention it deserves, which is the key to a polished, even result.
This handy infographic lays out the pre-game essentials to get you set up for success.
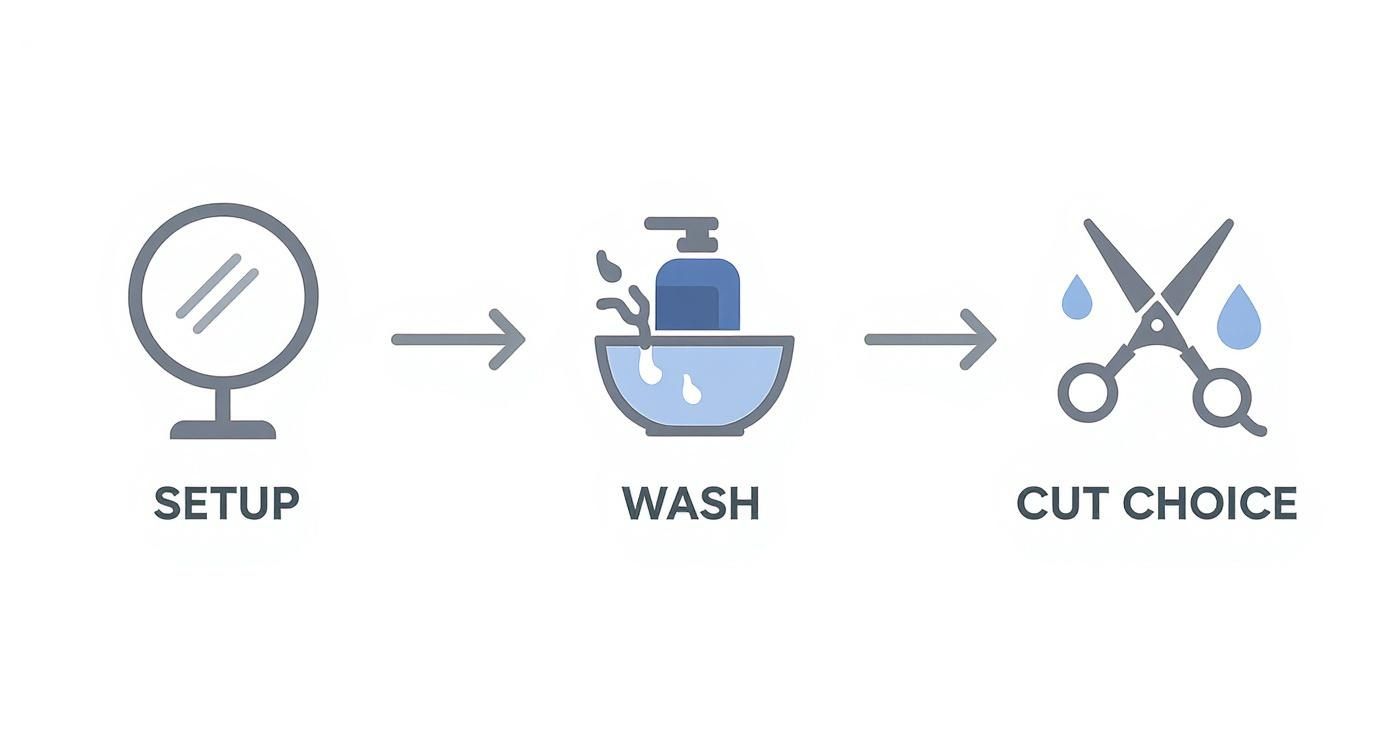
As you can see, a great cut is all about the foundation: proper setup, clean hair, and choosing the right approach for your hair type.
The First and Only Commandment of Home Trims
Before a single hair is cut, I want you to repeat after me: "I will cut less than I think I need to." Seriously, burn this into your brain. You can always go back and take a little more off, but you sure can't stick it back on. Start with a tiny trim—even just half a centimetre—especially if you're feeling the jitters. This one rule will save you from a world of haircut regret.
Keeping our hair in top shape is a big deal, and having the right tools makes all the difference. Investing in professional-grade products from our website ensures you're giving your locks the care they deserve, promoting long-term health and vitality.
How to Get Clean Lines and Soft Ends
Right, let's do this. Grab your first small section and comb it out until it's perfectly smooth. Now, clamp it taut between your index and middle fingers. Slide your fingers down to where you want to cut, keeping them perfectly parallel to the floor for a dead-straight, blunt line. This is now your guide.
Using your super-sharp shears, make the cut. If you're going for a razor-sharp, chic bob, you can cut straight across. But for most of us who want a softer, more lived-in look, you'll want to use a technique called point cutting.
Pro Tip: Point cutting is the secret weapon against that chunky, "I just cut my own hair" look. Instead of cutting horizontally, you snip vertically into the ends. This breaks up the solid line and creates a subtle texture that helps the hair blend and move naturally.
It’s a fantastic trick for making your trim look less severe and a lot more professional.
Add a Little Shape with the "Twist Cut"
Feeling a bit more adventurous? If you want to add a whisper of layering without committing to a full-on shag, the twist cut is your new best friend. It's an incredibly forgiving way to create soft, natural-looking layers that can frame your face and give your hair some oomph.
Here’s the game plan:
- Take a small, vertical section of your hair.
- Twist it tightly from the root right down to the very end, like a little rope.
- Hold it firmly.
- Now, with your shears, make a few light snips into the twisted section at a downward angle.
What you're doing is removing minuscule amounts of length from different strands within that twist. When you let it go, you're left with these beautiful, almost invisible layers. It’s perfect for breathing life into long hair or just softening the edges of your style without losing any noticeable length.
Whatever you do, take it slow. Trim one section, let down the next, and use the hair you've just cut as your guide. Consistency is everything, and our high-grip clips will keep your sections clean and out of the way, so you can focus on getting that perfect line, snip by snip. You've got this.
Styling and Aftercare: The Finishing Touches

Alright, take a breath. You did it! The hard part is officially over. Now for the fun bit—the final polish that turns your handiwork from a simple trim into a salon-worthy style.
Before you put those scissors down, give your hair a quick final once-over. Stand back, check all the angles in the mirror, and hunt for any rogue stray hairs or tiny uneven patches. It’s always easier to snip off a stray millimetre now than to spot it in a photo later.
Give Your Freshly Cut Ends Some Love
Now that the cut is done, your hair is thirsty. Those freshly trimmed ends are at their most vulnerable, so it’s the perfect time to give them a hit of moisture and protection. This is how you stop future split ends in their tracks and lock in that healthy shine.
We always recommend reaching for a quality hair serum straight after a trim. A good serum, like the ones in our store, smooths down the hair cuticle and seals those new ends. It’s like putting a little protective shield on each strand, adding a gorgeous gloss and keeping frizz at bay.
A great leave-in conditioner is another must-have in your toolkit. Our formulas are packed with ingredients that hydrate and strengthen your hair from the inside out, keeping it soft and resilient. It’s a simple step, but it makes a massive difference.
Think of it this way: the cut is the reset, but the aftercare is what makes it last. Using the right serums and conditioners from our store immediately after a trim fortifies your hair and ensures your efforts result in lasting health and shine.
Keep Your Tools in Top-Notch Condition
Your hairdressing tools are an investment, and looking after them properly means they’ll stay sharp and effective for countless trims to come. If you let them get dull or rusty, you risk snagging and damaging your hair next time around.
Here’s a super simple routine to get into after every use:
- Wipe them down: Grab a soft, dry cloth and carefully wipe off any hair clippings or product from the blades.
- Give them a sanitise: A quick spritz of a disinfectant spray from our collection will keep them hygienic and ready for next time.
- Store them safely: Pop your shears back into their protective case. This stops the blades from getting knocked about or damaged.
A little bit of care goes a long way. Keeping split ends away is an ongoing game, and having sharp, clean tools is a massive advantage. For more tips from the pros, check out our guide on how to prevent split ends for good.
Learning to trim your own hair is an empowering skill that gives you total control. With the right tools and products from Online Hair Depot, you can maintain beautiful, healthy hair on your own terms, saving time and money while achieving professional results.
Got a Few More Questions Before You Start Snipping?
Even with the best game plan, a few last-minute jitters are totally normal. Let's tackle some of the most common questions that pop up when people decide to take the scissors into their own hands.
Think of this as your final pep talk. You've got the right tools from our store, you know the techniques, so let's clear up those last little doubts.
How Often Should I Really Be Trimming My Hair?
The magic number for most people is every 6-8 weeks. This is the sweet spot for nipping split ends in the bud before they can wreak havoc and travel up the hair shaft. Stick to this schedule, and you’ll give your hair its best shot at healthy, sustained growth.
But of course, life isn't one-size-fits-all. If you're maintaining a super sharp, structured cut like a blunt bob, you might need a little tidy-up every 4-6 weeks to keep those lines looking razor-sharp. On the flip side, if your goal is mermaid-length hair, you can probably stretch it out to 10-12 weeks between trims.
Your hair will always give you hints. If the ends look a bit see-through, feel like straw, or are constantly getting into knots, that’s your sign. It’s time for a trim.
What’s the Biggest Goof-Up People Make?
Hands down, it's getting a bit too scissor-happy and chopping off way too much in one go. The excitement is real, I get it! But remember, you can't glue hair back on.
My best advice? Start by trimming less than you think you need. Seriously, even just a centimetre. You can always go back and take a little more off, but you can't undo a cut that’s too short.
The runner-up for the biggest mistake is using the wrong scissors. Those junk-drawer kitchen shears might seem tempting, but they’ll only crush and fray your ends, basically giving you a head start on your next batch of split ends. Proper hair shears from our store make a surgically clean cut that seals the cuticle, which is what you're after for healthy hair.
The Age-Old Question: Wet or Dry?
Ah, the great debate! Honestly, the best answer depends entirely on your hair type and what it does naturally.
-
For Straight or Wavy Hair: Trimming on damp hair usually gives you the cleanest, most precise lines. The big catch? Hair shrinks when it dries! Always be super cautious and cut less than you think you need to account for the "bounce-up."
-
For Curly or Coily Hair: A dry cut is your best friend. No question. This lets you see how each individual curl falls and clumps together, so you can trim according to your hair's natural shape. It’s the only way to avoid that dreaded surprise shrinkage and wonky layers once it's all dry.
Ultimately, working with your hair's texture, not against it, is the secret to a look you'll actually love.
Ready to build your ultimate at-home hair trimming kit? From professional shears to nourishing aftercare, On Line Hair Depot has everything you need to achieve salon-quality results. Explore our full collection and start your journey to healthier hair today at https://onlinehairdepot.com.


